This guide provides steps to set up access and authenticate securely with SharePoint Online.
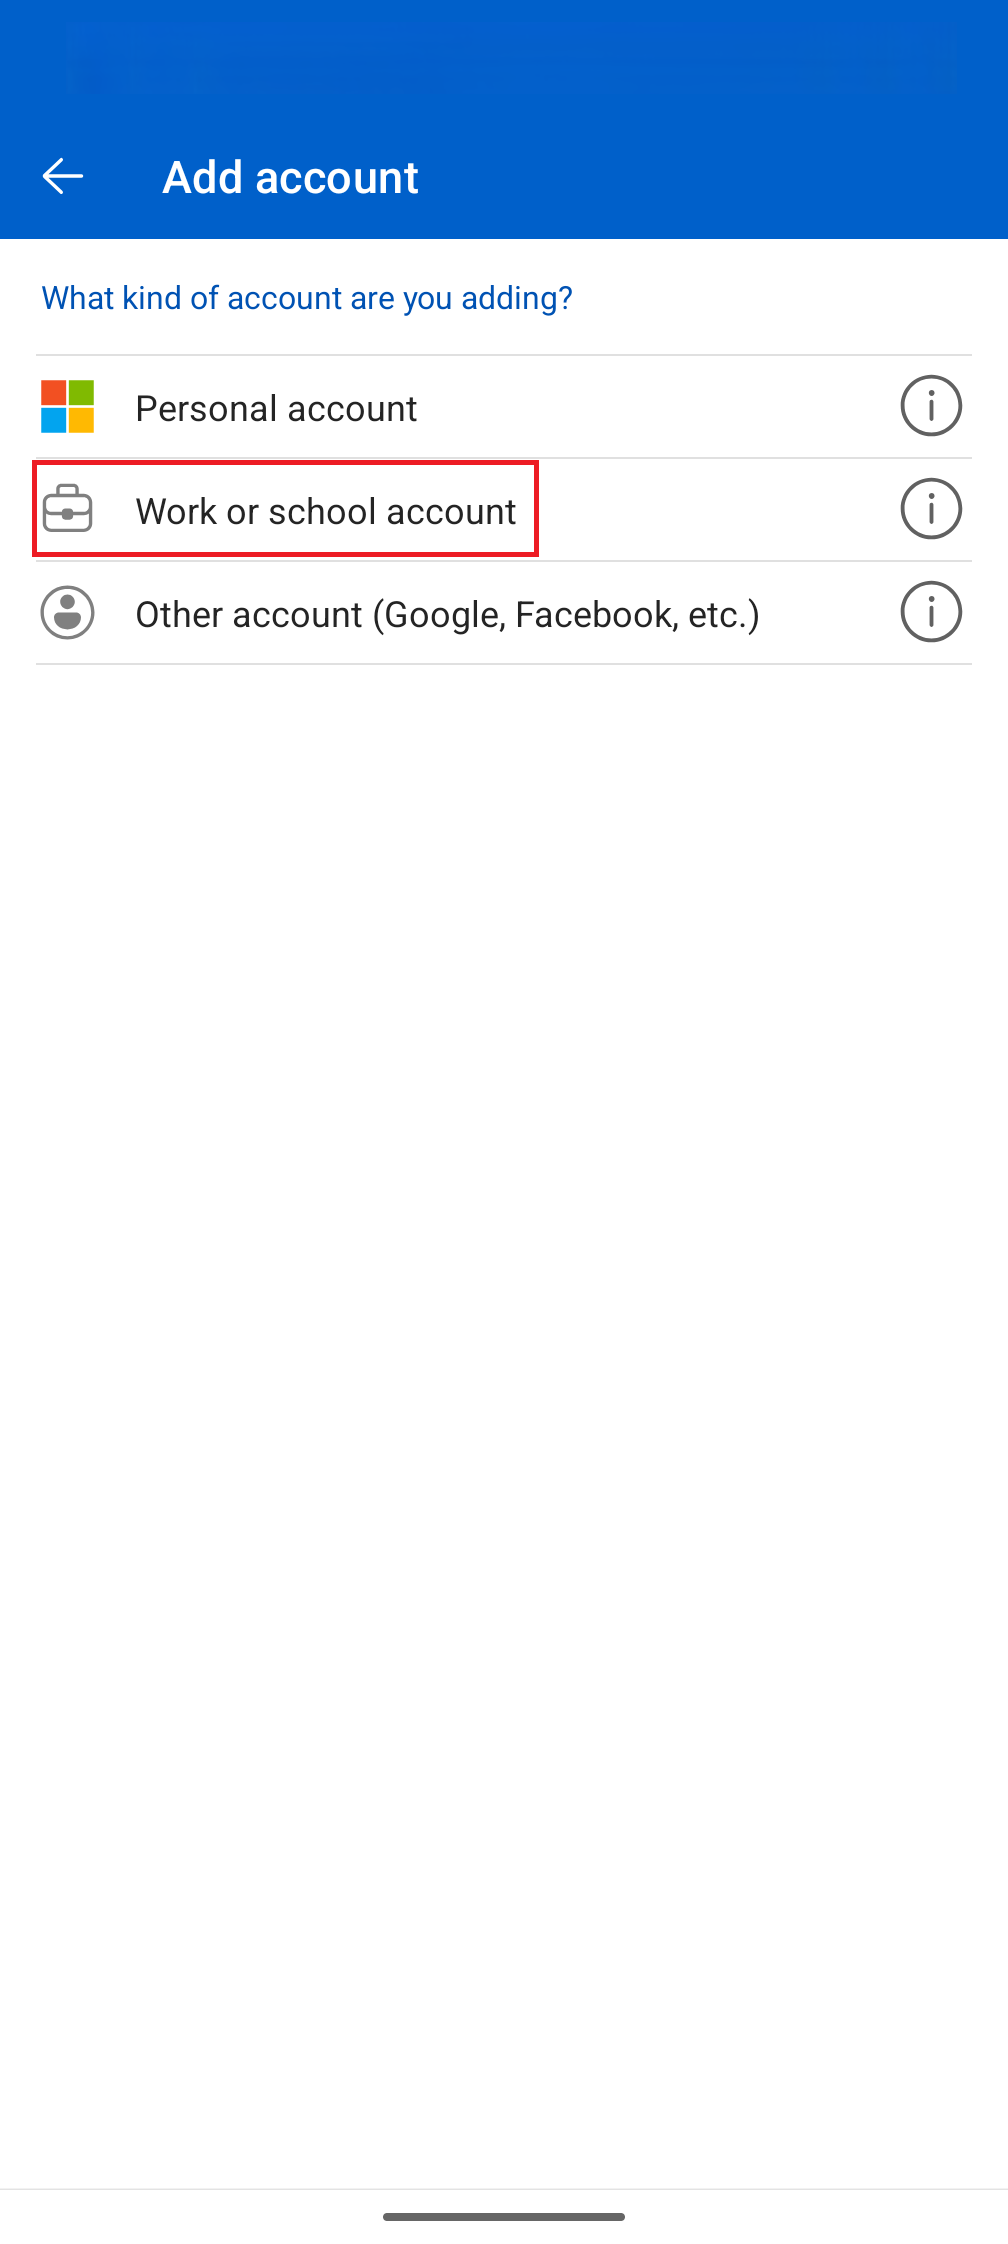
To begin accessing files stored on the D. E. Shaw group's SharePoint Online site, you will need the following:
- A Microsoft account: To access SharePoint Online, you need a Microsoft account with your sign-in email. Please confirm whether you have an existing Microsoft account with your organization's IT department.
- Two-factor authentication (2FA) method: Two-factor authentication (2FA) is required by the D. E. Shaw group for file access. We recommend using the Microsoft Authenticator app on your mobile device.
In case you haven't set up these before, we've provided instructions below:
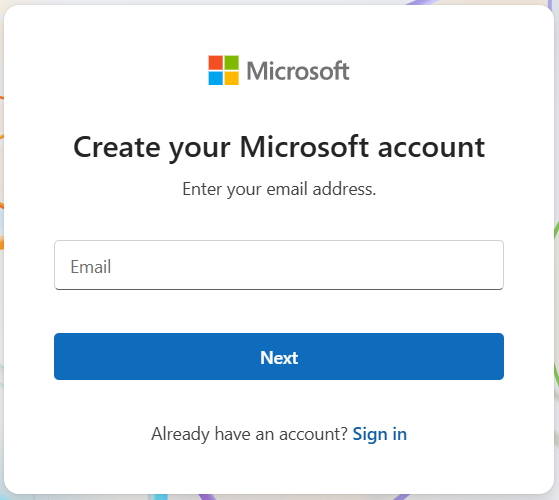
Follow these steps to create a Microsoft account:
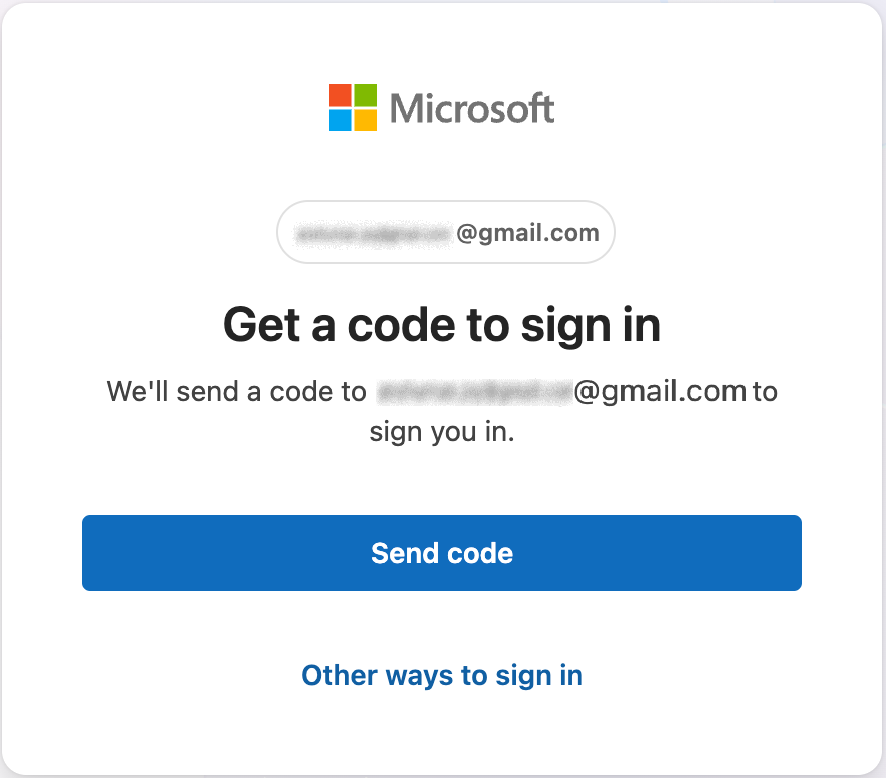
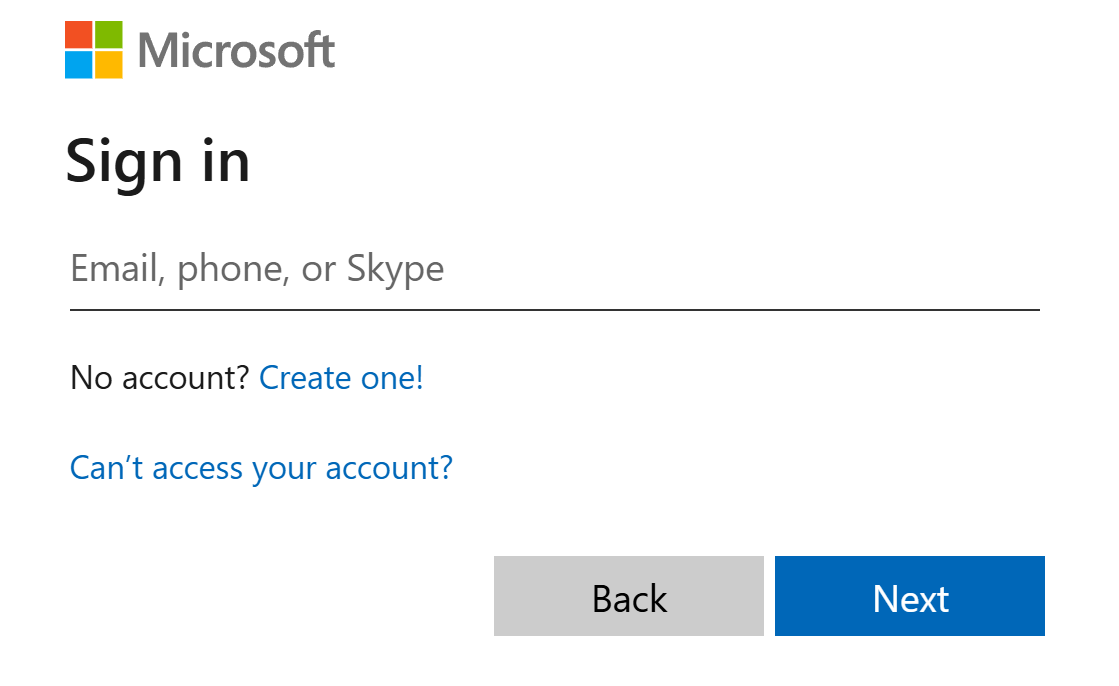
- Open the Microsoft Account page: Open your browser and visit the Microsoft Account Page. Enter the email address and click Next. Next.
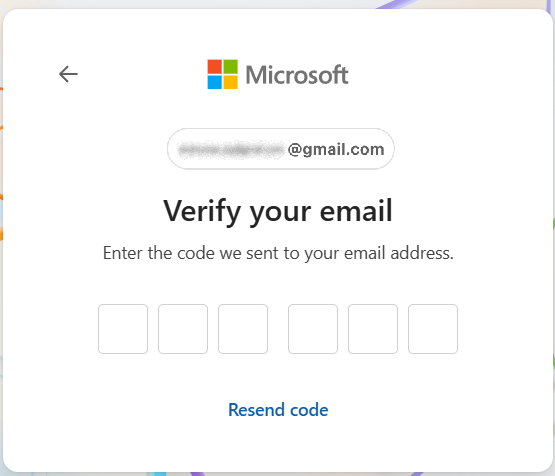
- Verify Your Email:
- Microsoft will email you a one-time passcode.
- Enter the passcode in the boxes, then click Next.
- If you do not receive the code, click Resend code.
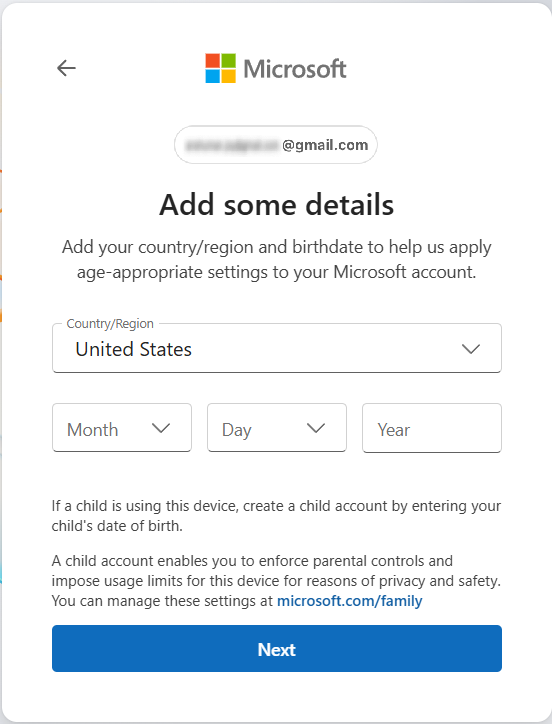
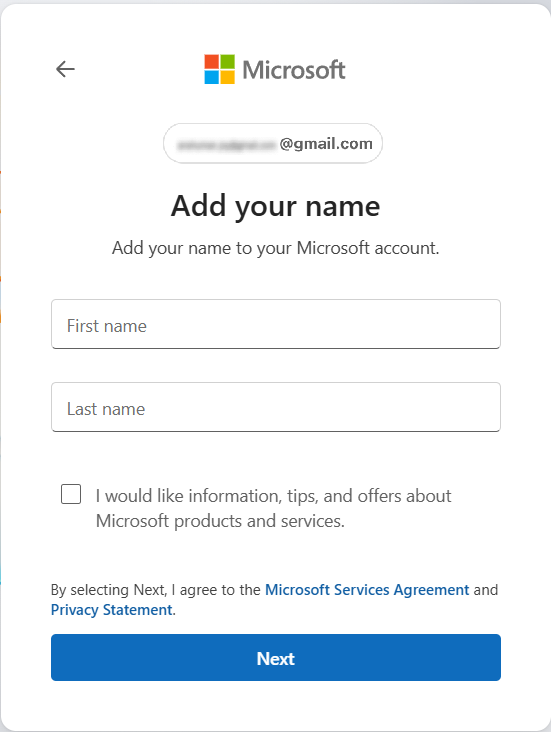
- Provide Personal Details: Provide your name and birth date, then click Next.
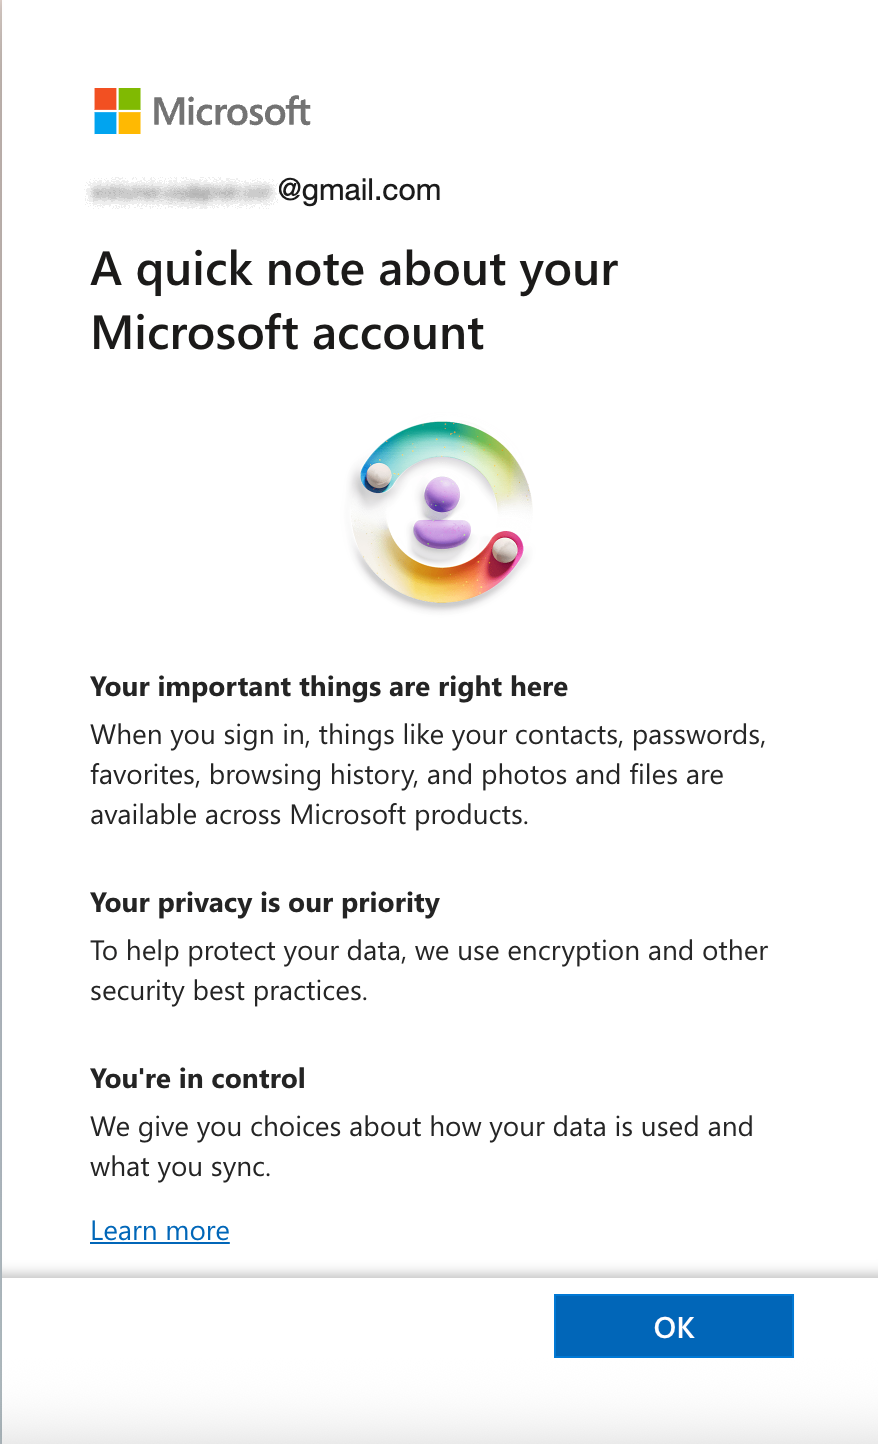
- Review Note from Microsoft: Review the note from Microsoft and click OK to proceed.
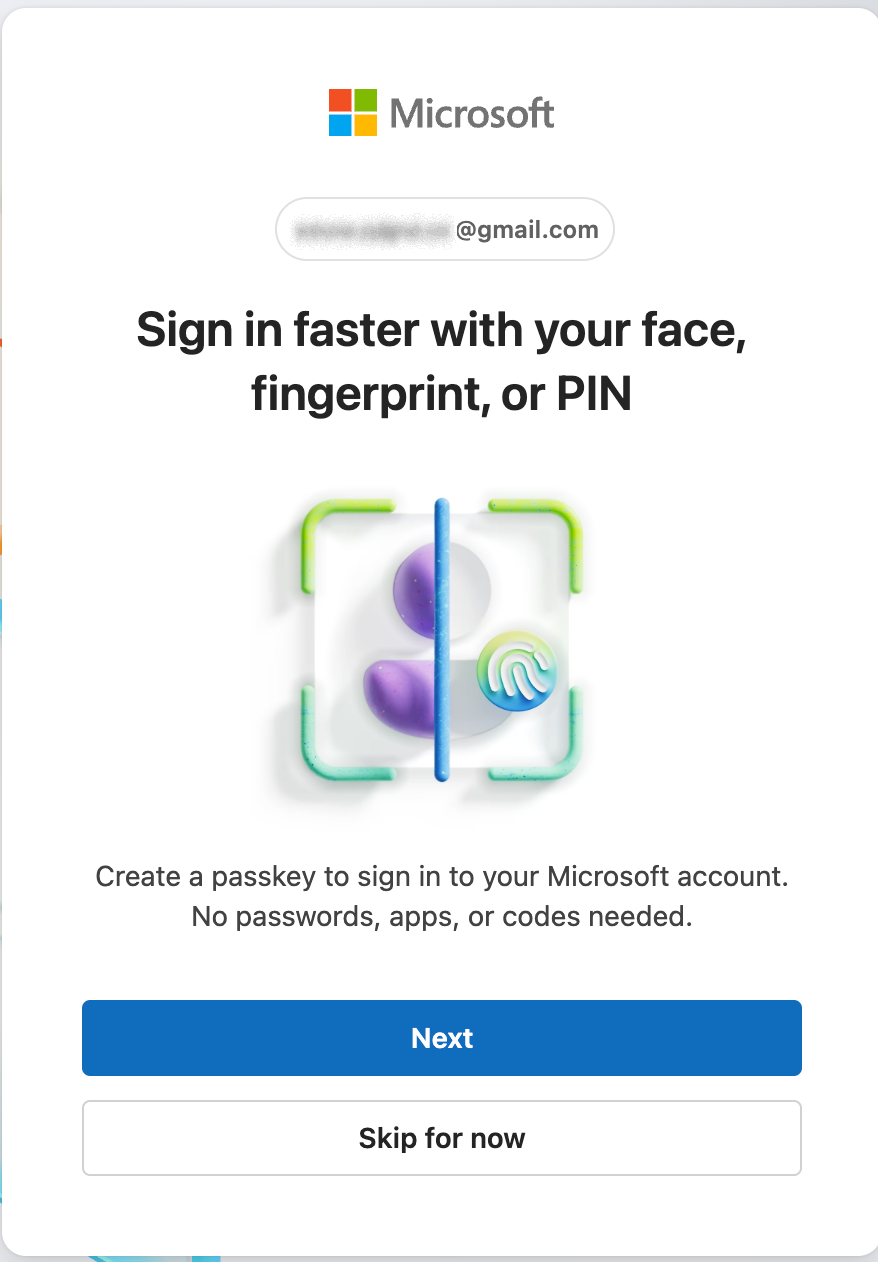
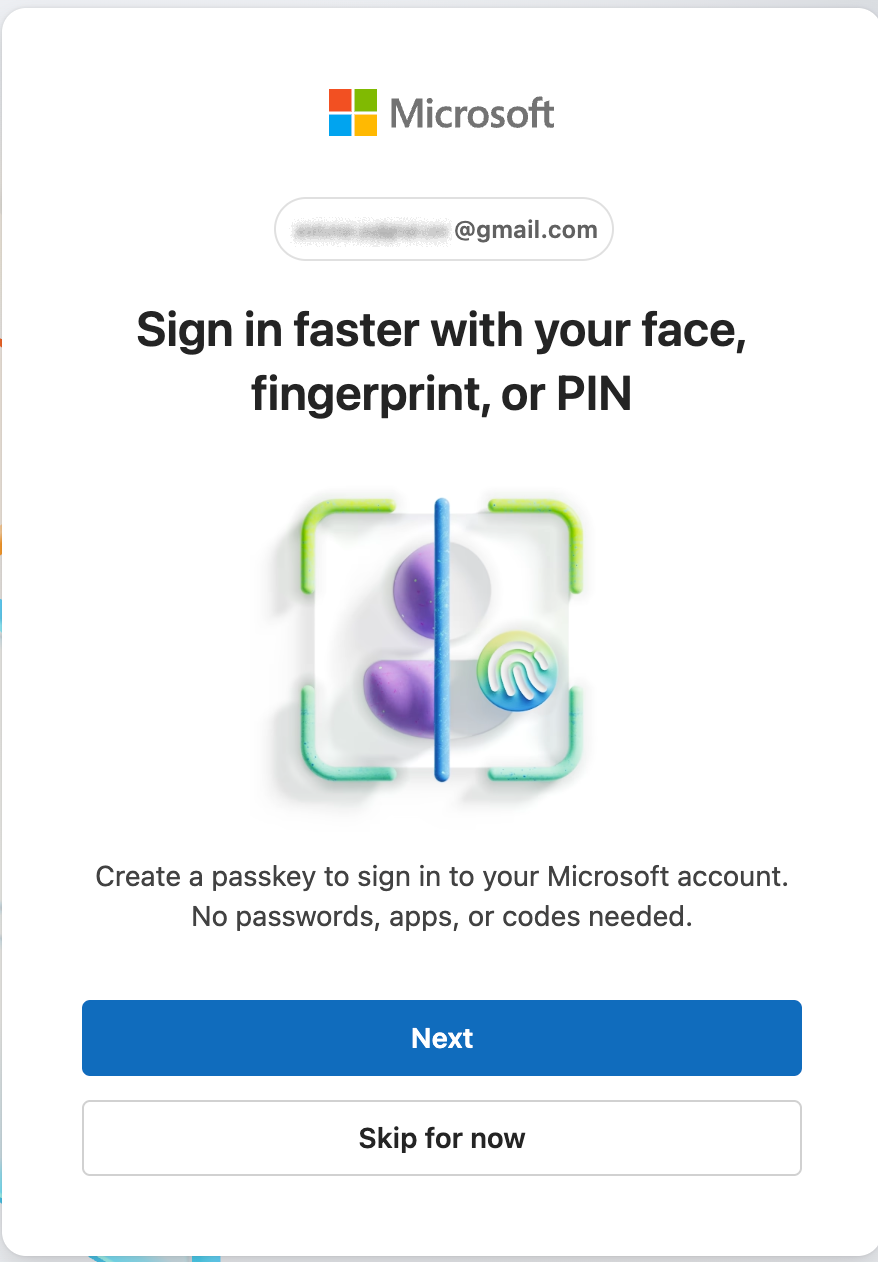
- [Optional] Create a passkey: You might be asked to create a passkey for quicker access.
- Click Next to continue.
- Click Skip for now if you prefer to skip.
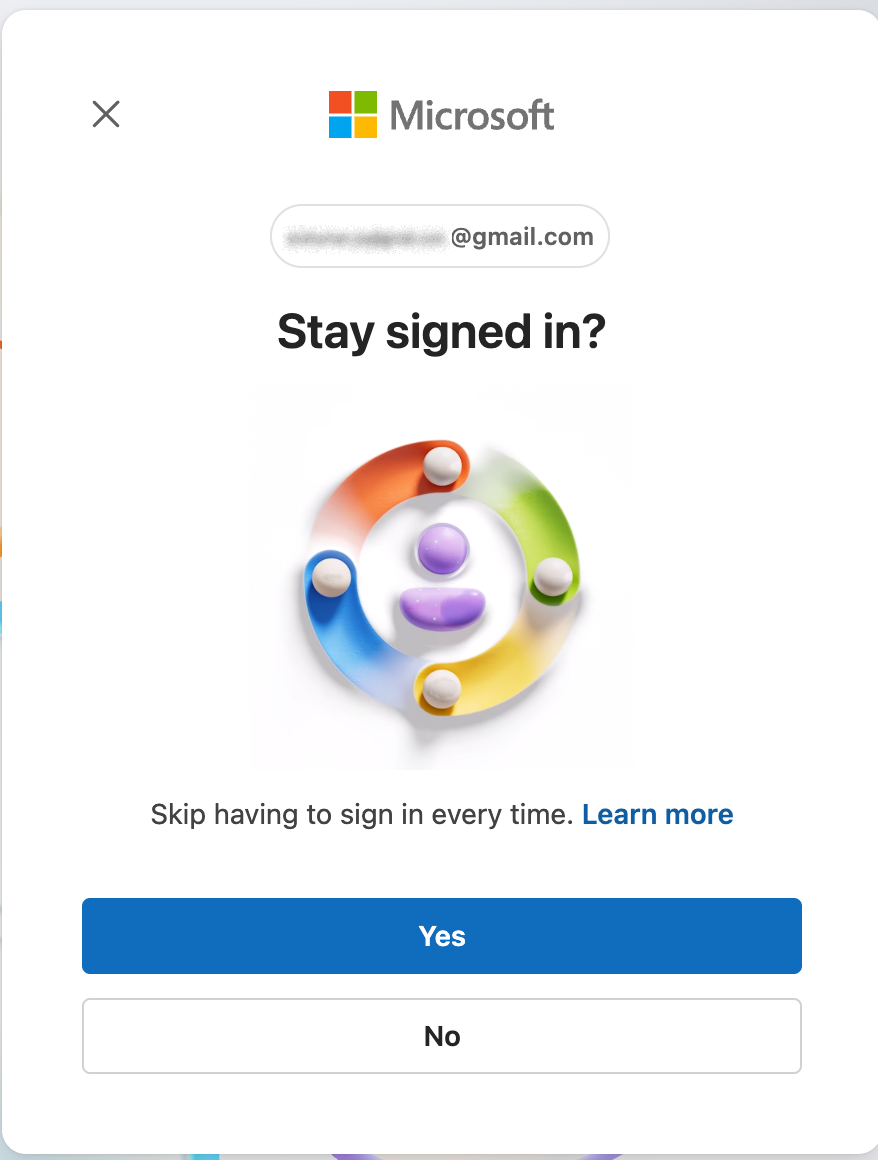
- [Optional] Stay signed in: You might be asked if you want to stay signed in.
- Click Yes to reduce future sign-ins.
- Click No if you prefer to sign in each time.
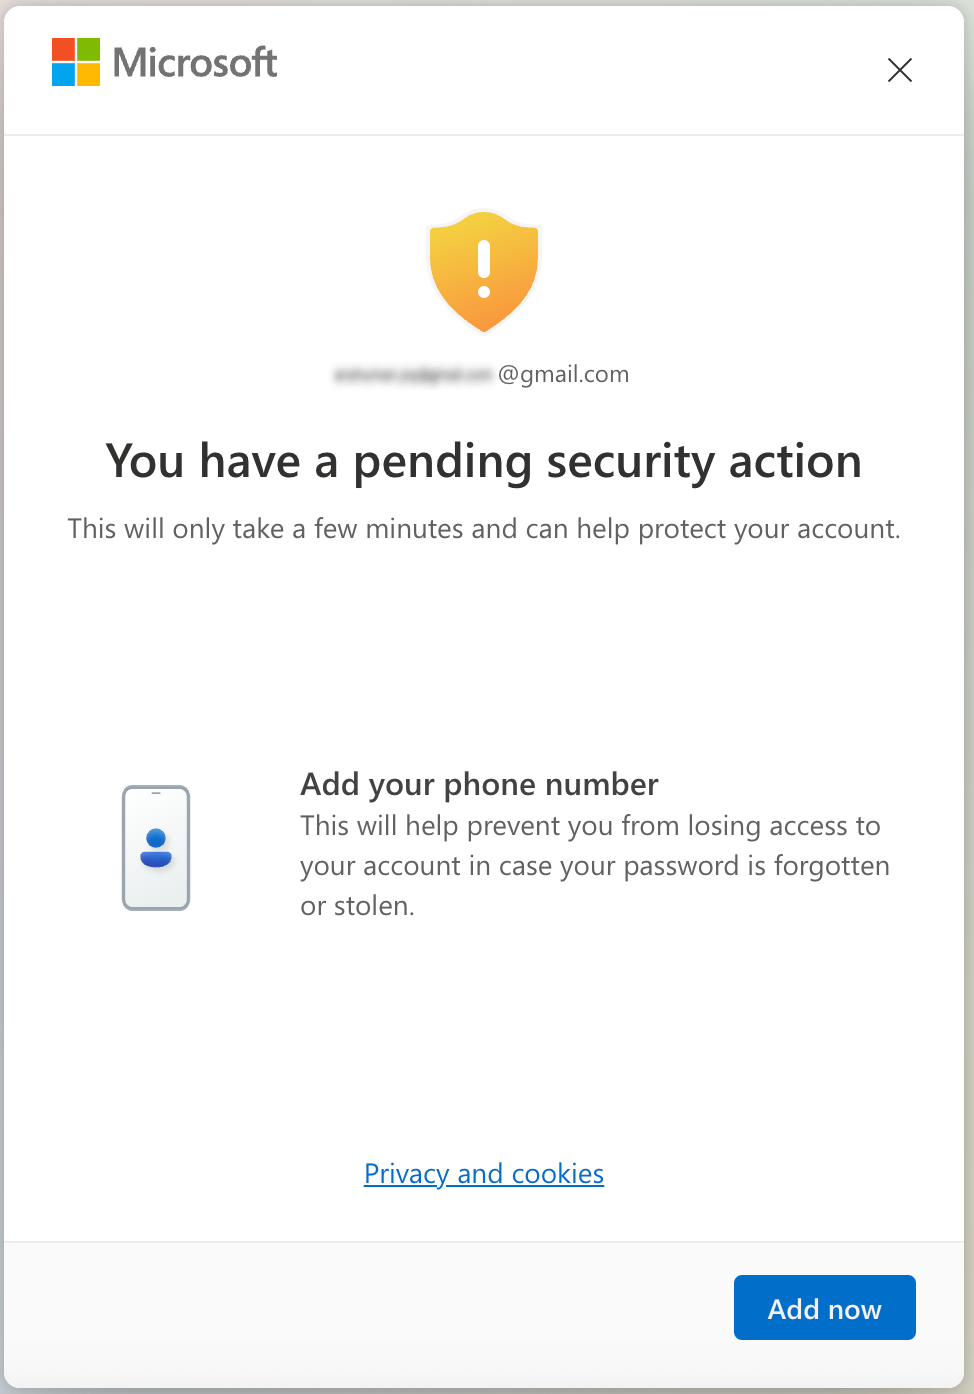
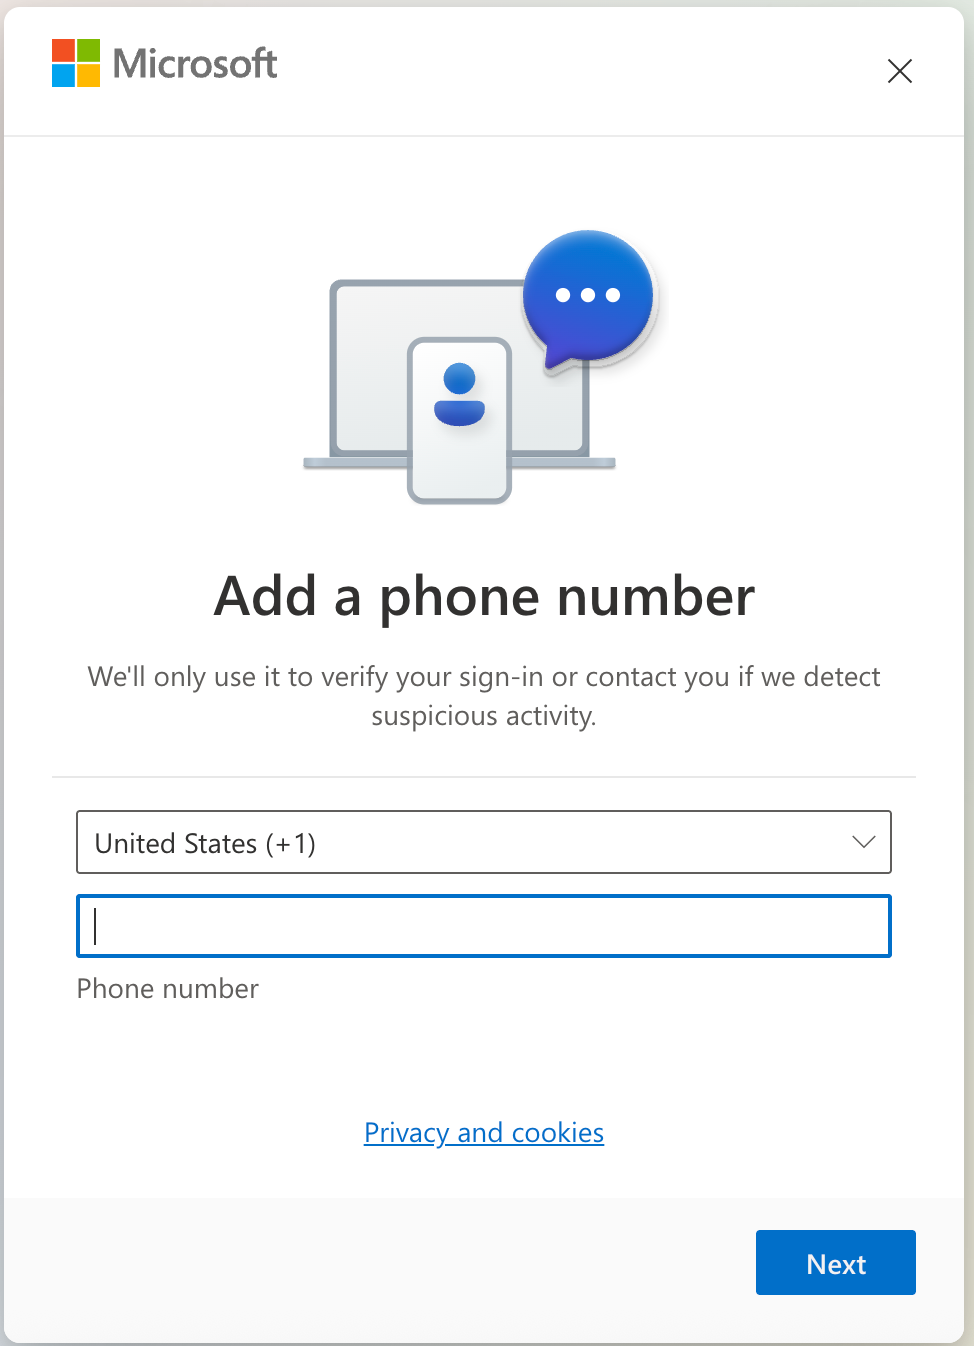
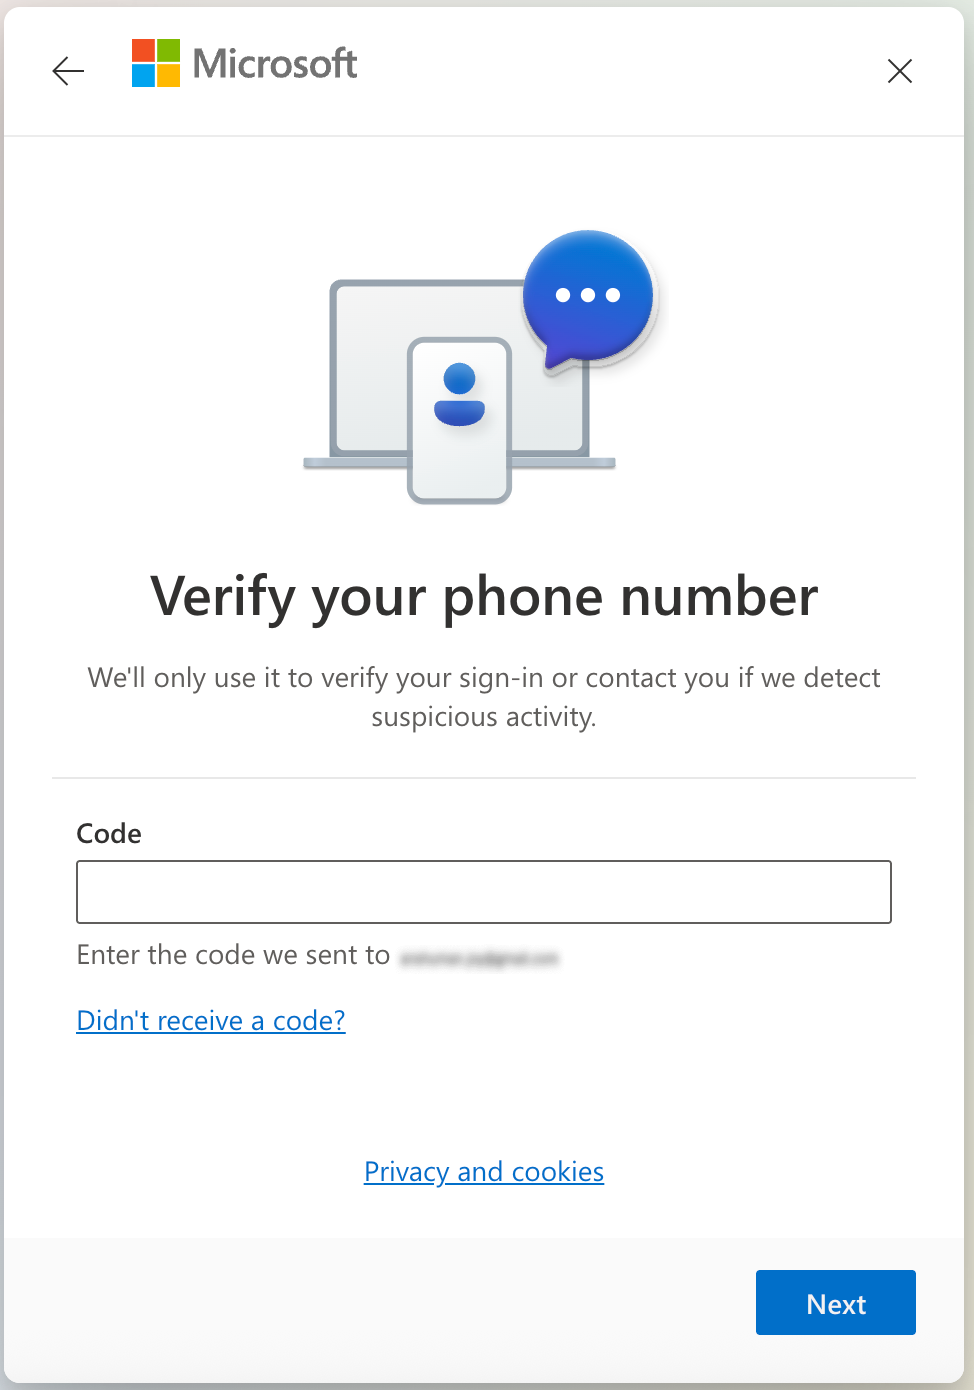
- [Optional] Add Account Recovery:
- If asked to add a recovery method ("You have a pending security action"), enter your phone number for added security.
- Click Add Now, enter your phone number, then the SMS code.
- If you prefer not to add this, close the pop-up.
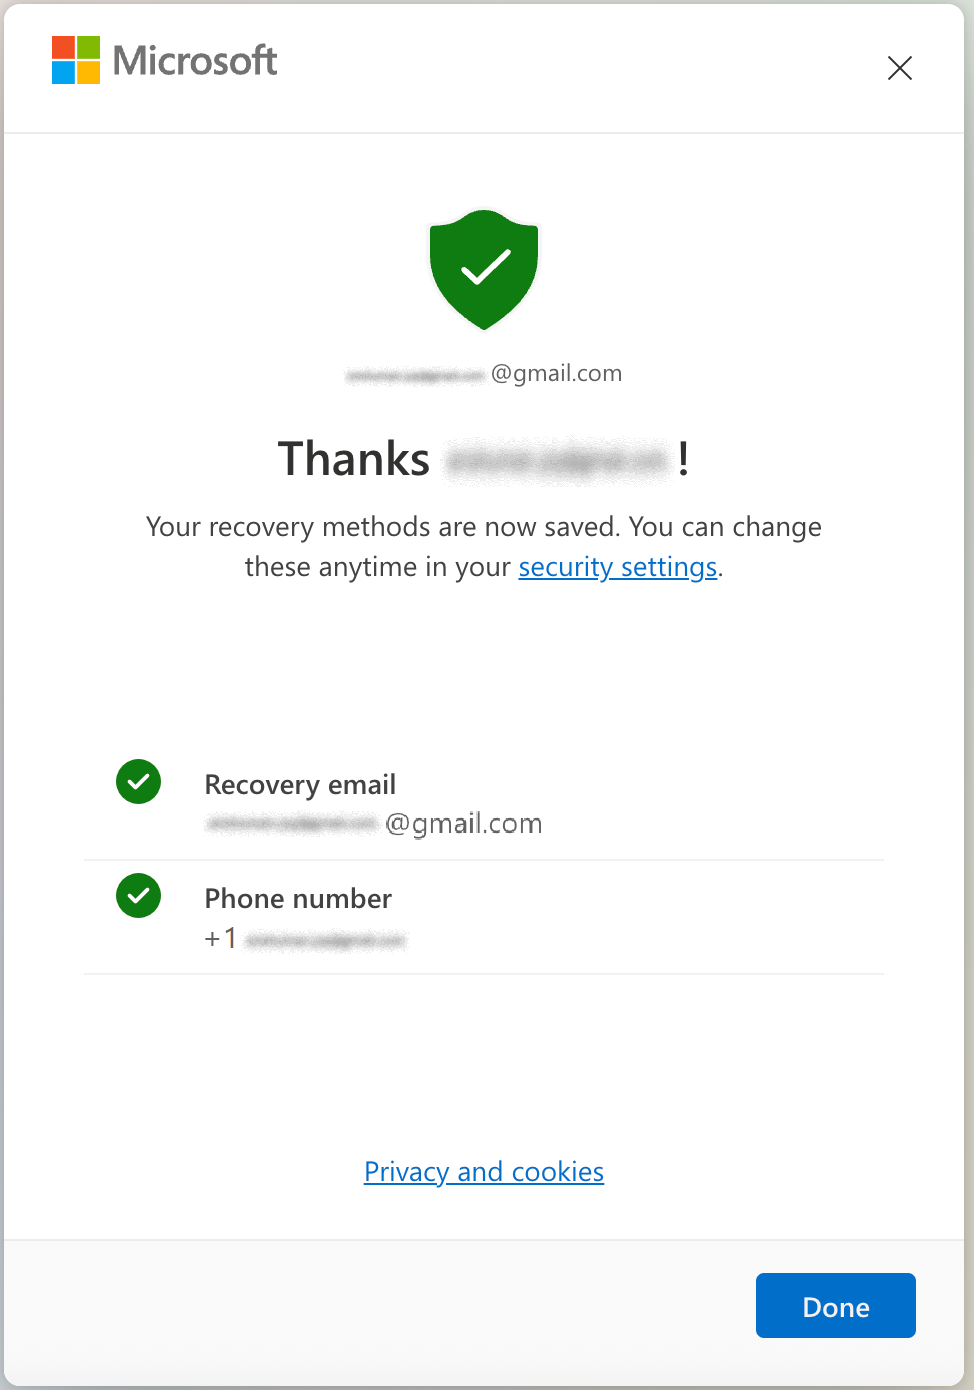
- All set! Your Microsoft account is ready to use.
If you have questions or encounter any issues, please reach out to your contact at the D. E. Shaw group for help.
Microsoft Authenticator
Microsoft Authenticator offers fast, simple, and secure two-factor authentication for Microsoft services, including SharePoint Online. To get the app on your mobile device, visit the Microsoft Authenticator setup guide, or search for "Microsoft Authenticator" in your app store and download it.
Requirements
- An active Microsoft Account with your sign-in email.
- Microsoft Authenticator app installed on your mobile device.
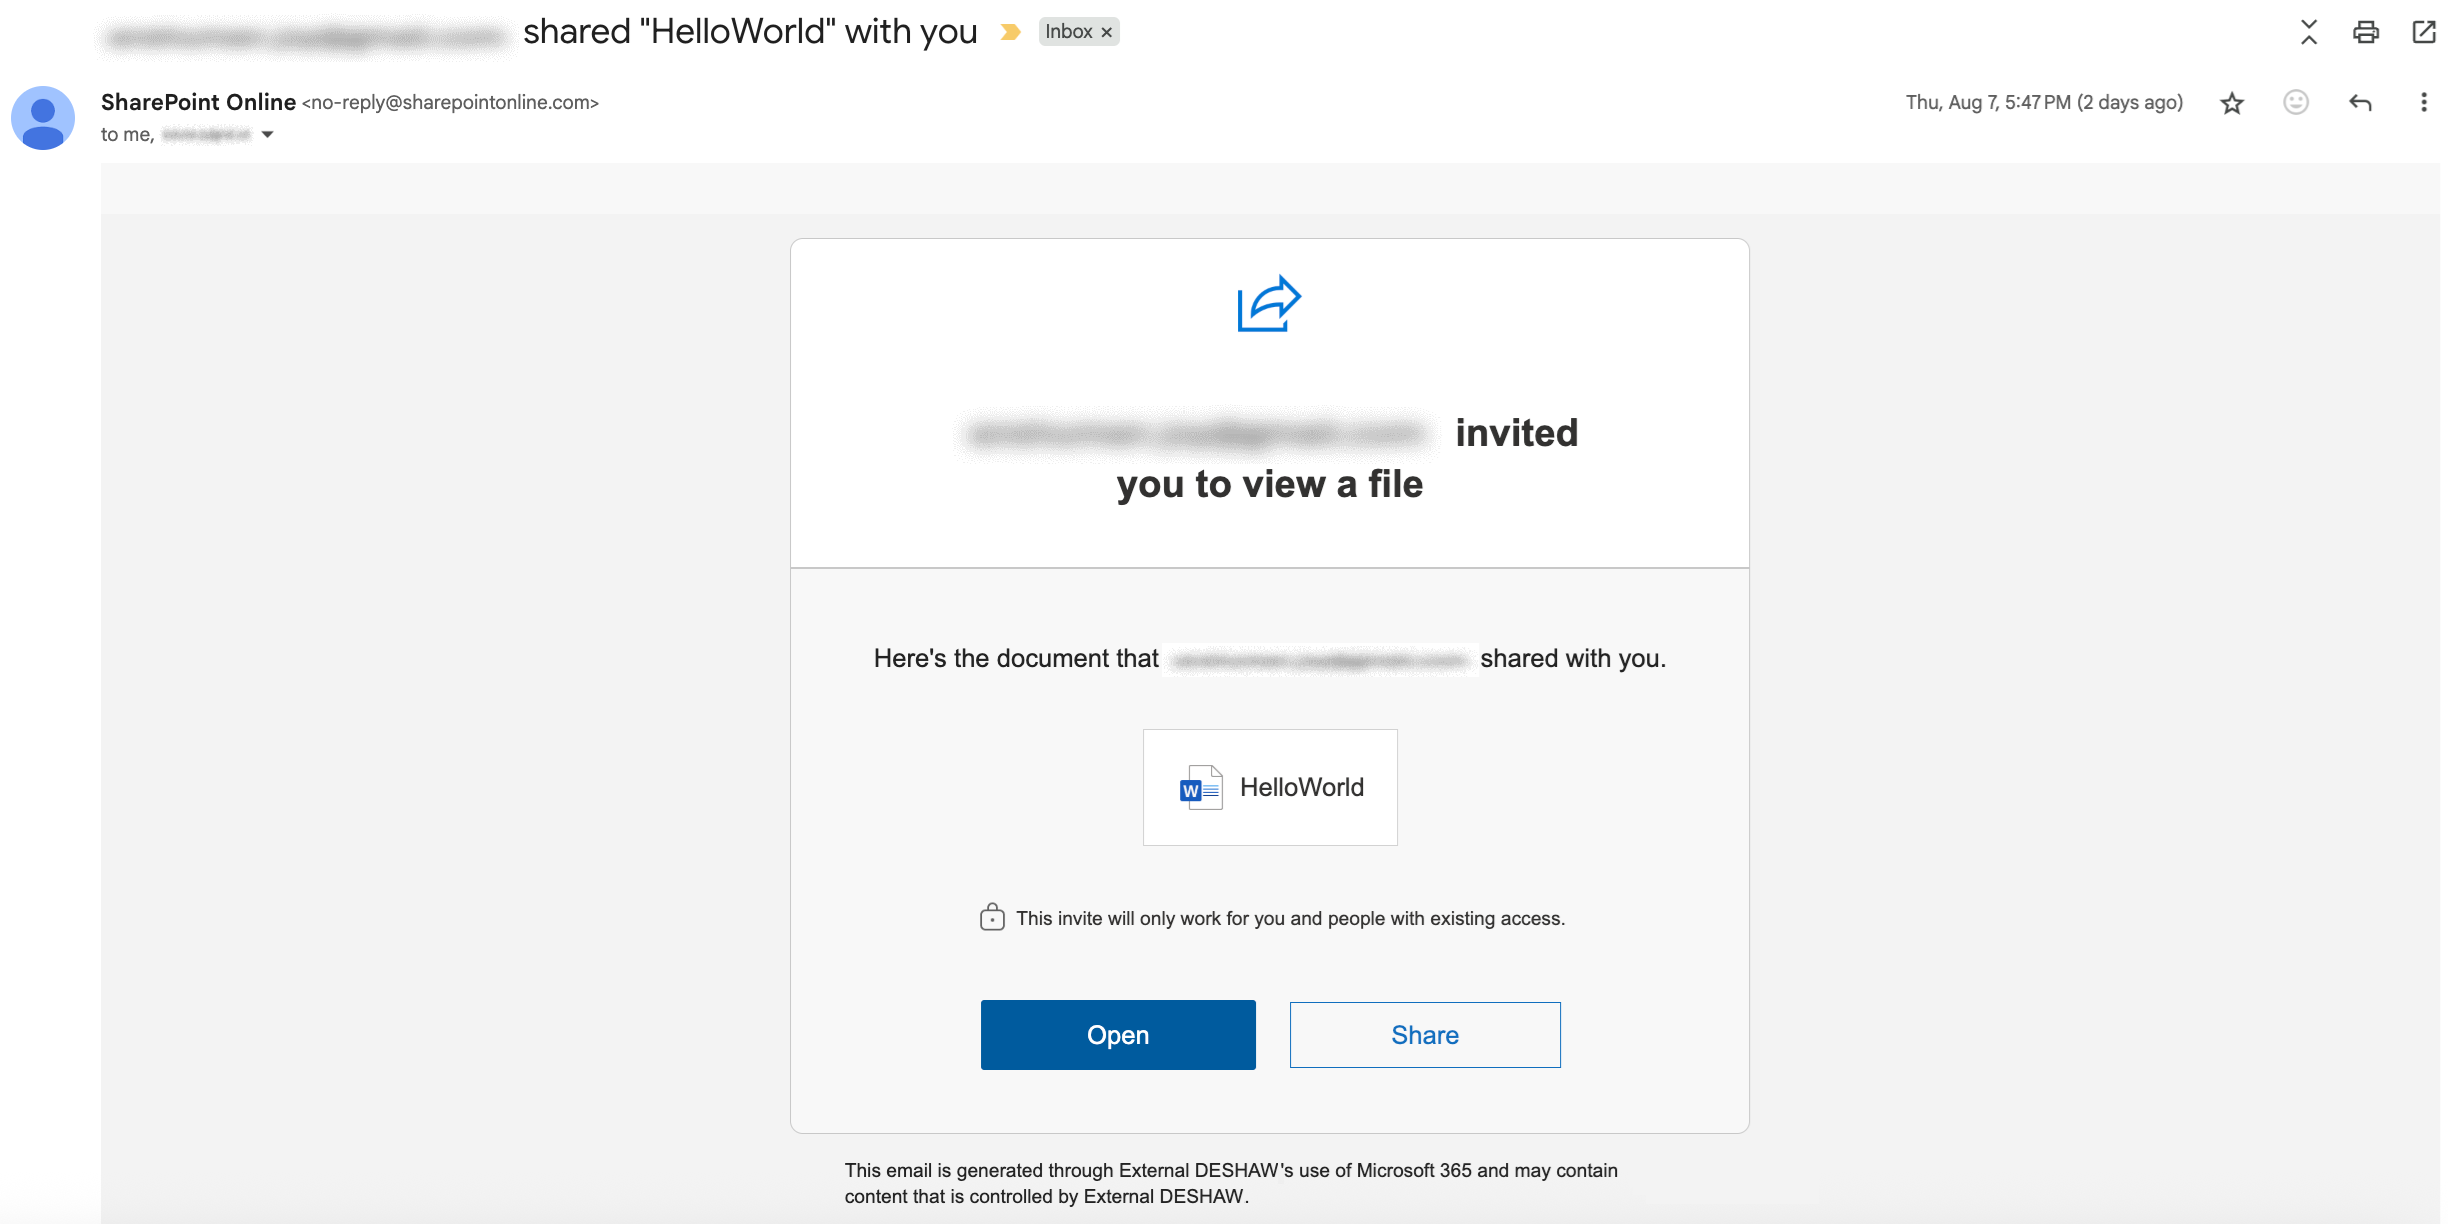
- Invitation or link via email sent by your contact at the D. E. Shaw group.
Instructions
- You will receive an email invitation with a button or link to Open the shared file. Click it to start. You will be redirected to the Microsoft Login page.

- Enter your email and click Next.

- Click Send Code to receive a one-time passcode by email. Enter the code as instructed.
- [Optional] You might be asked if you want to stay signed in.
- Click Yes to reduce future sign-ins.
- Click No if you prefer to sign in each time.

- [Optional] You might be asked to create a passkey for quicker access.
- Click Next to continue.
- Click Skip for now if you prefer to skip.

- You will see a form for "More information required." Click Next.

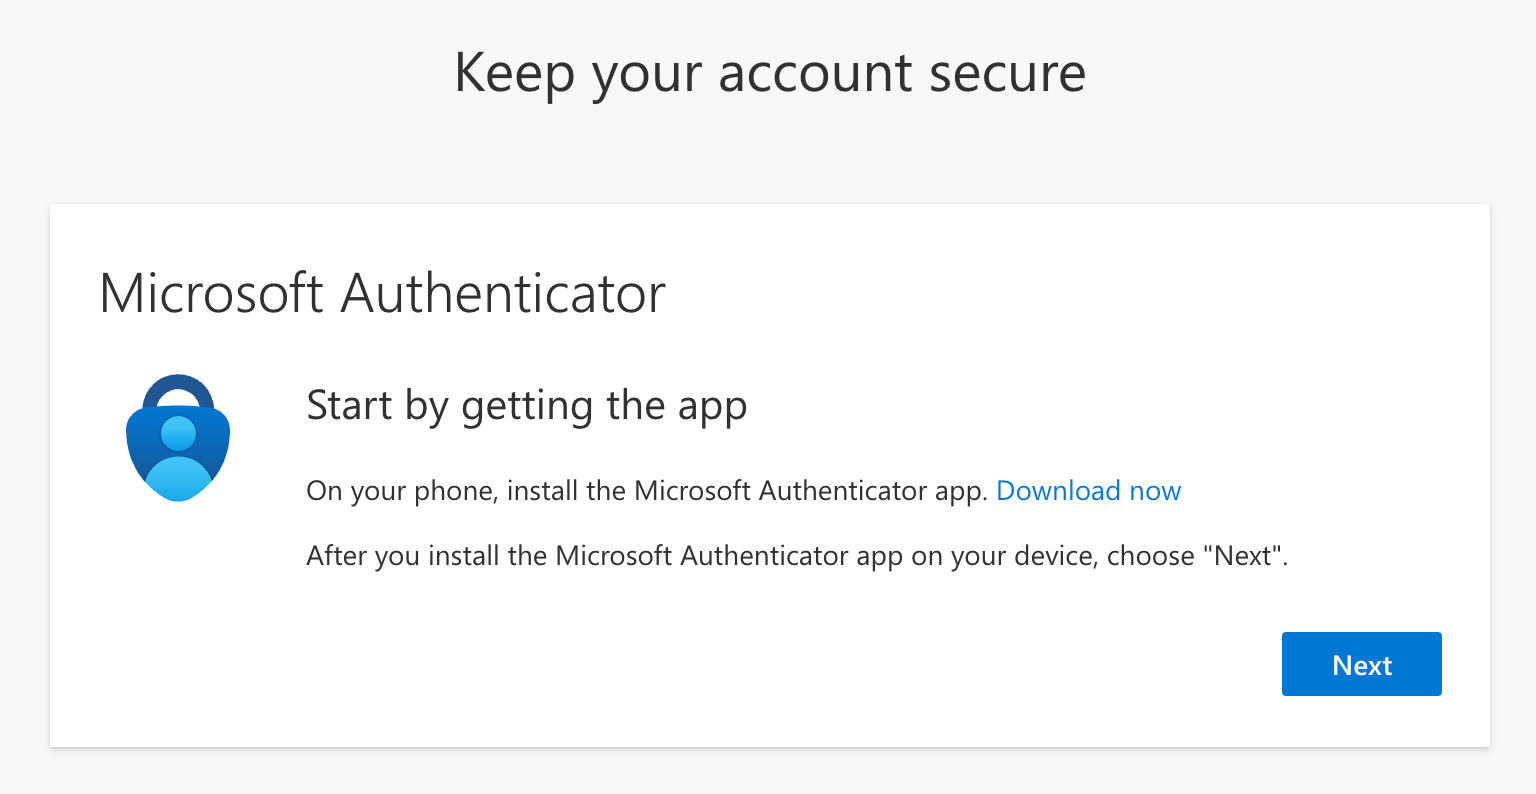
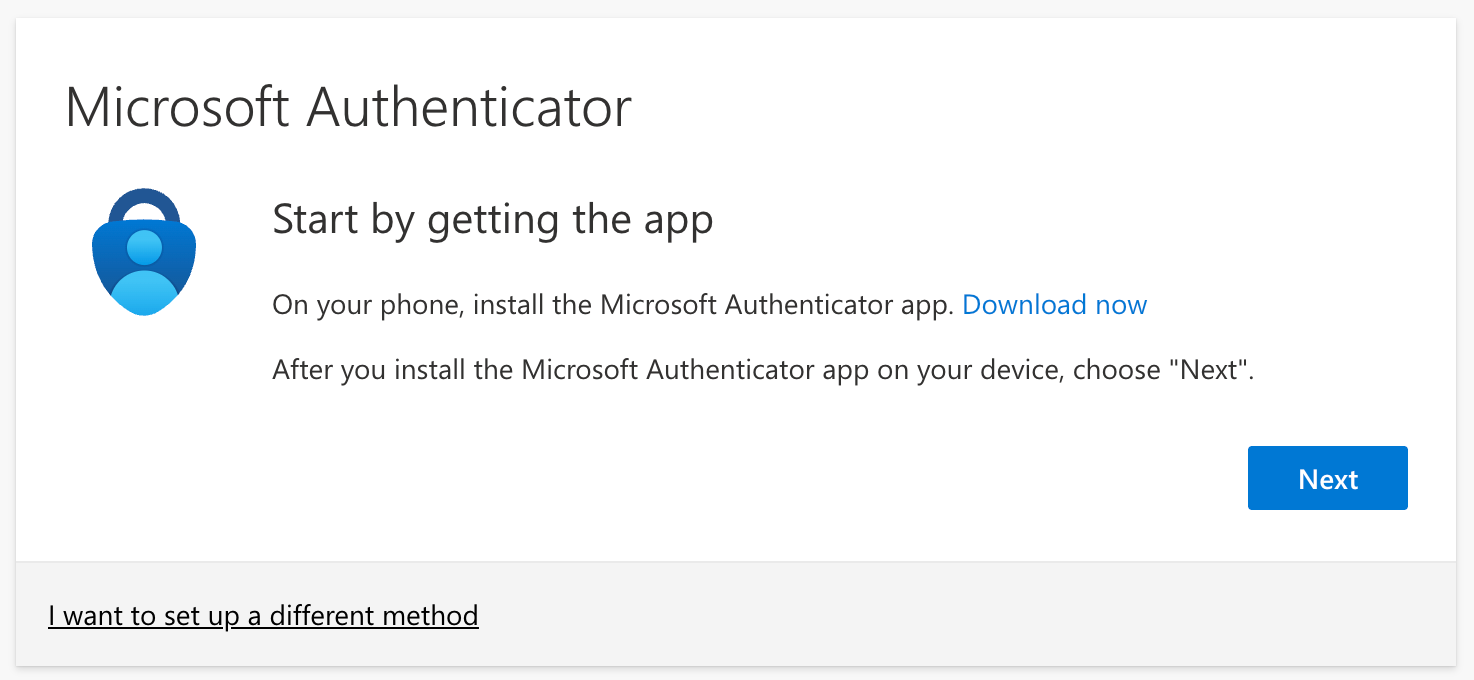
- You will be guided to set up Microsoft Authenticator for the D. E. Shaw group.
- If Microsoft Authenticator is installed on your mobile device, tap Next.
- Alternatively, download and install the Microsoft Authenticator app from your device's app store.
- Scan the QR Code:
- Click Next. You will see a QR code in your browser.
- Open the Microsoft Authenticator app on your mobile device.
- In the top right corner, click the + button, choose Work or school account, then select Scan a QR code.
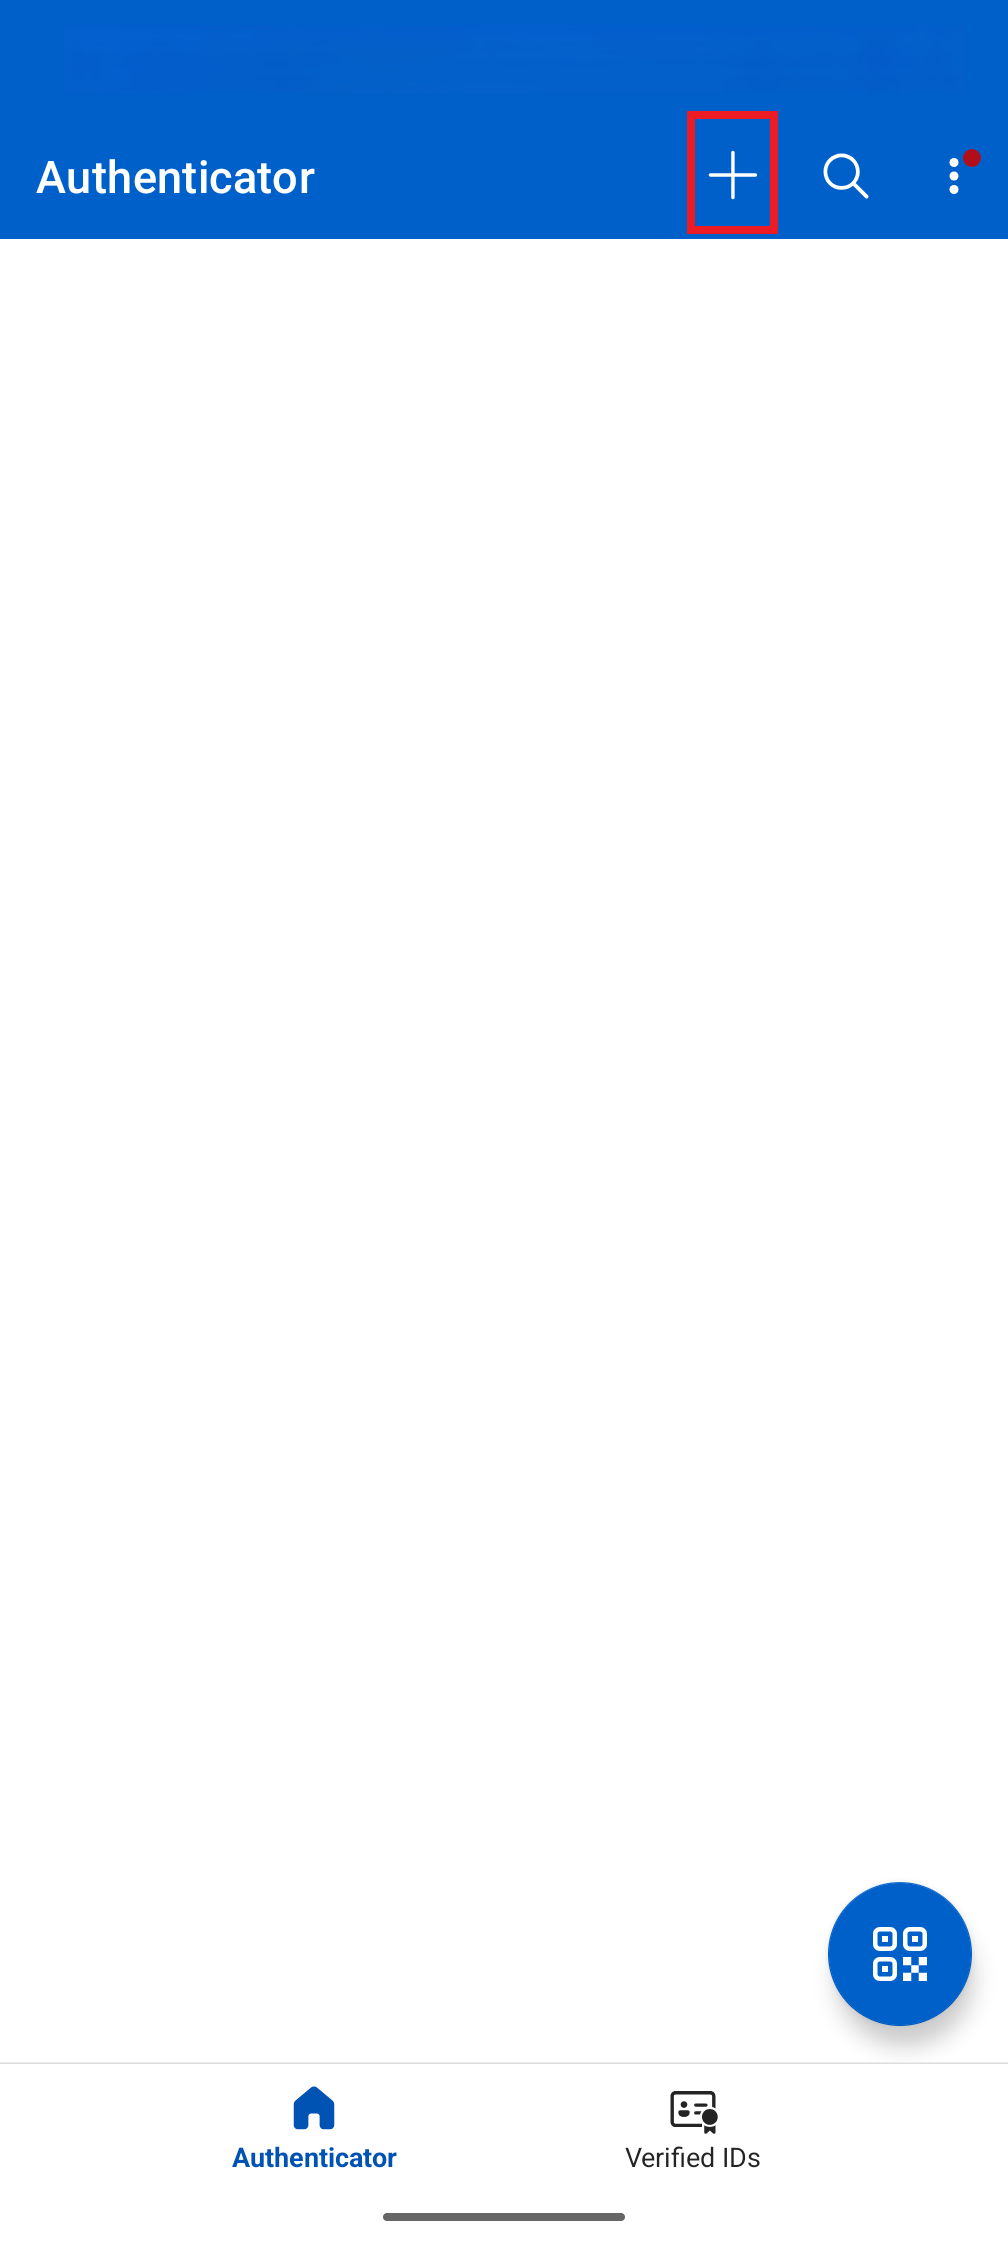
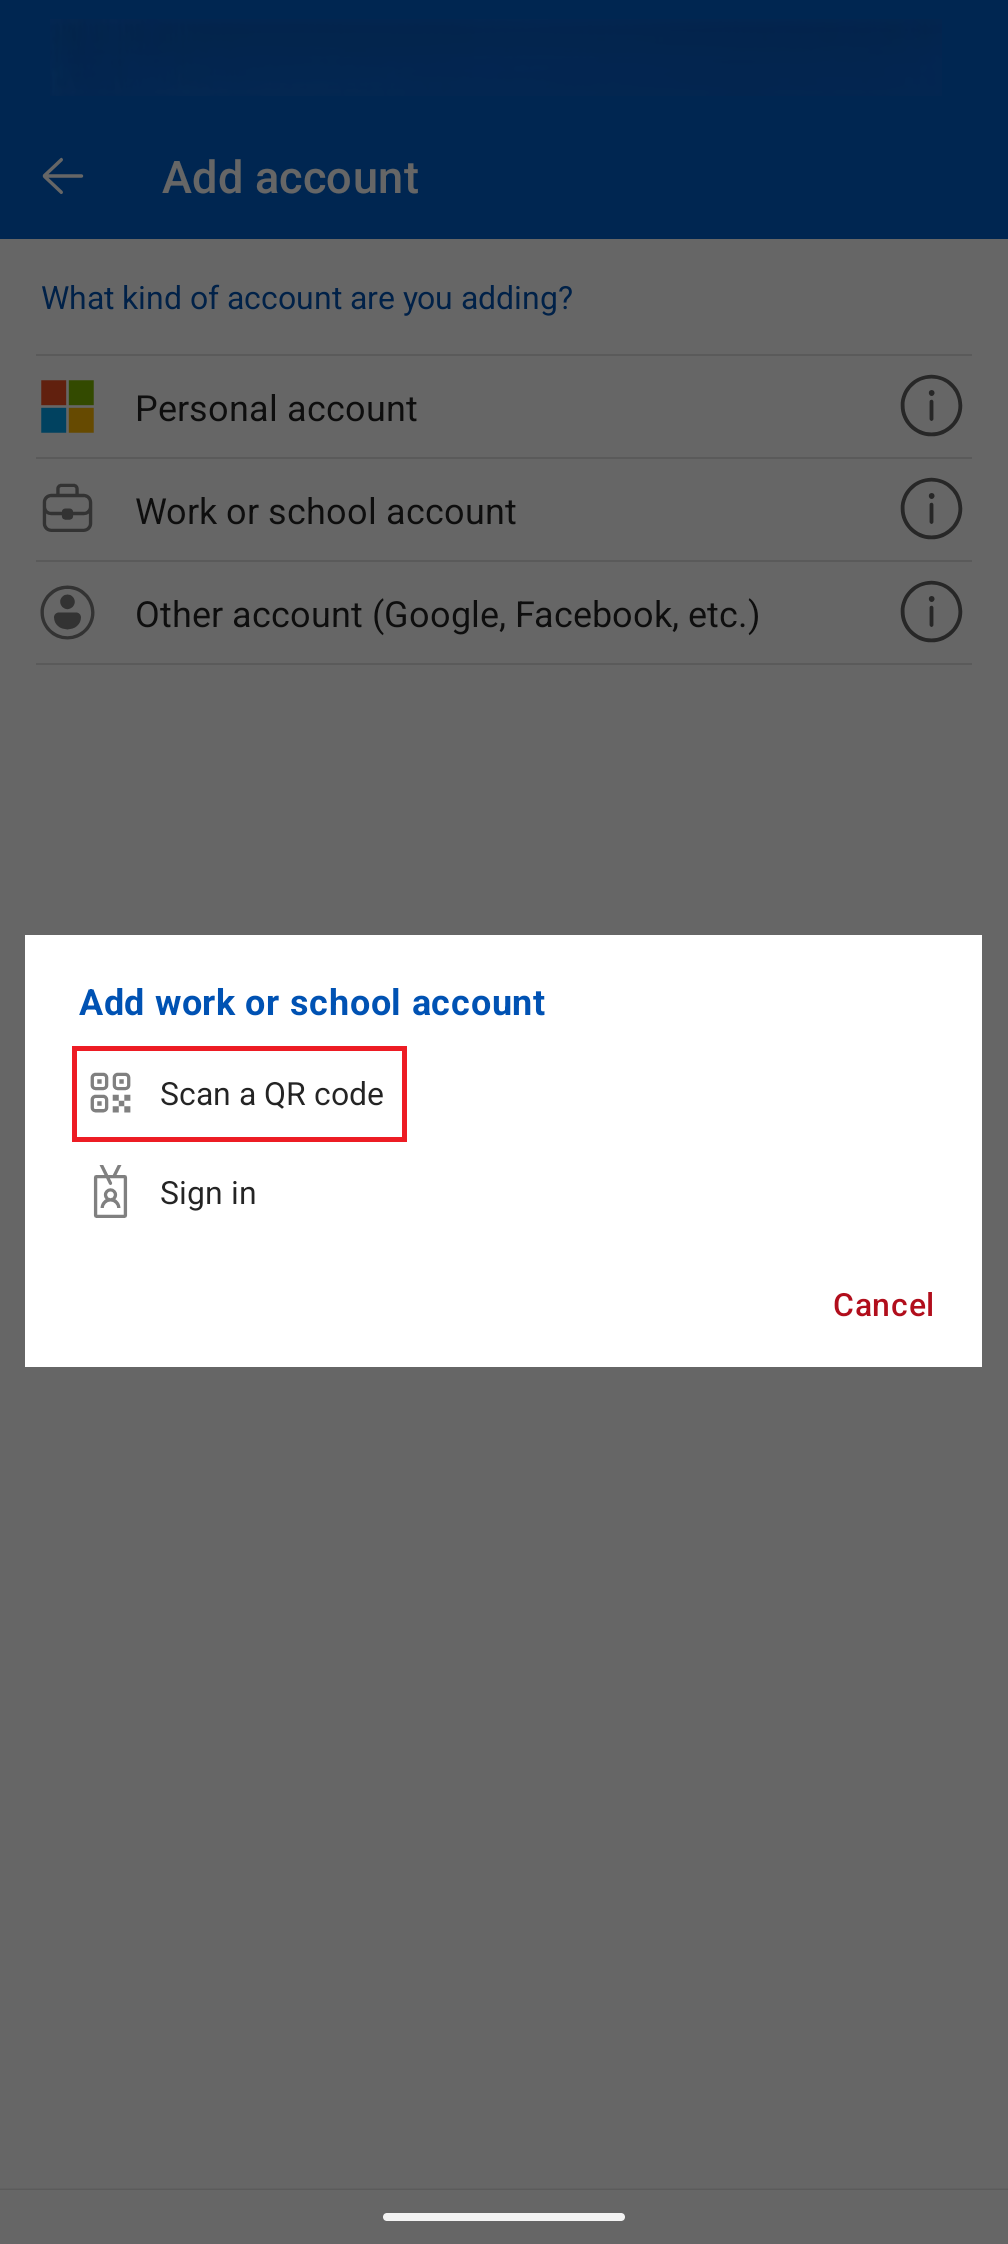
- Scan the QR code on your computer screen using your device's camera.
- If prompted, allow notifications.
- Confirm Setup:
- After adding the account to the app, click Next in your browser.
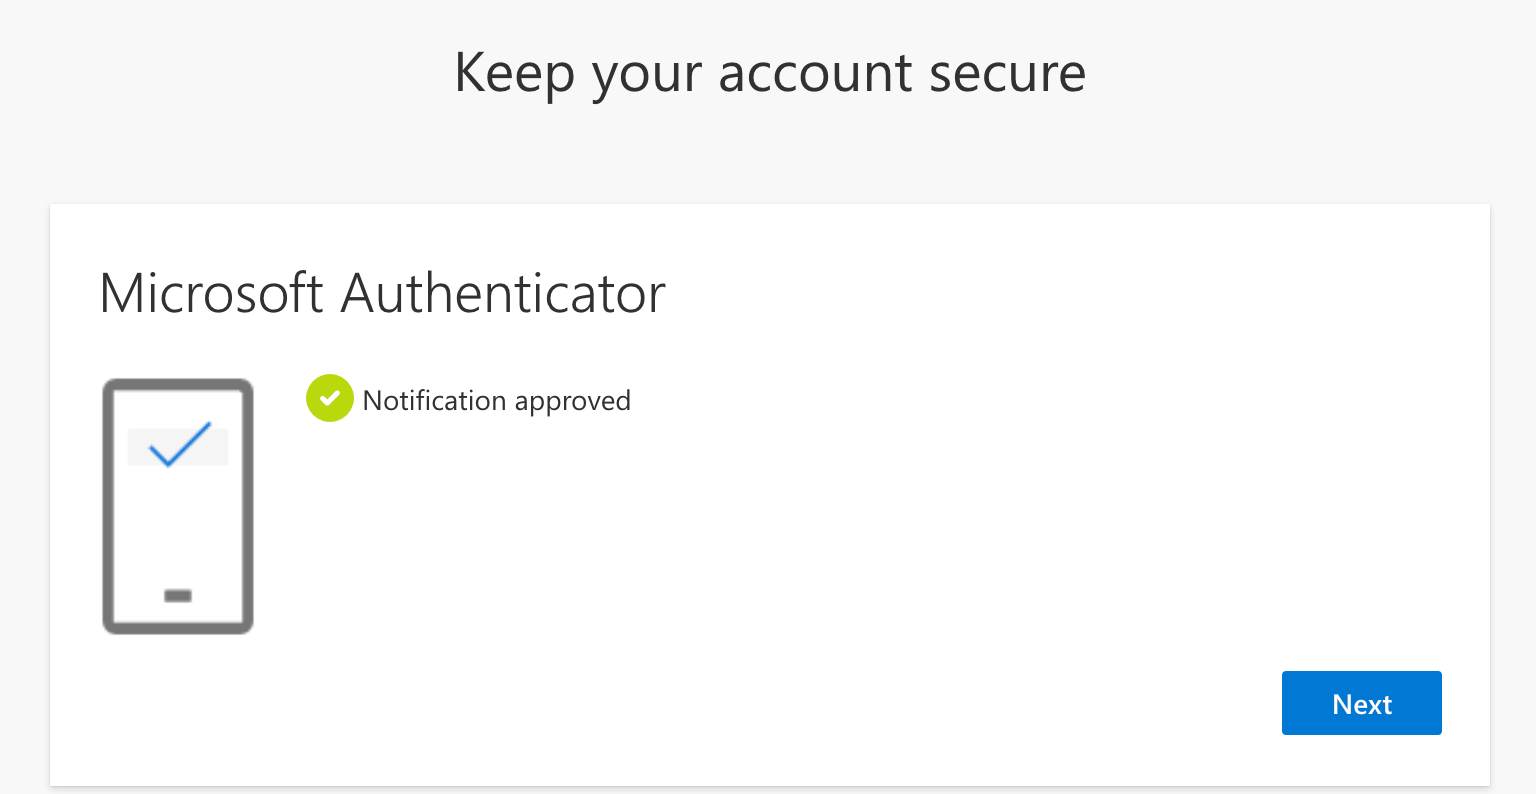
- A number will appear on your computer screen.
- On your mobile device, enter this number in the Authenticator app and tap Yes.

- Your browser should display "Notification Approved." Click Next.
- Test Authentication:
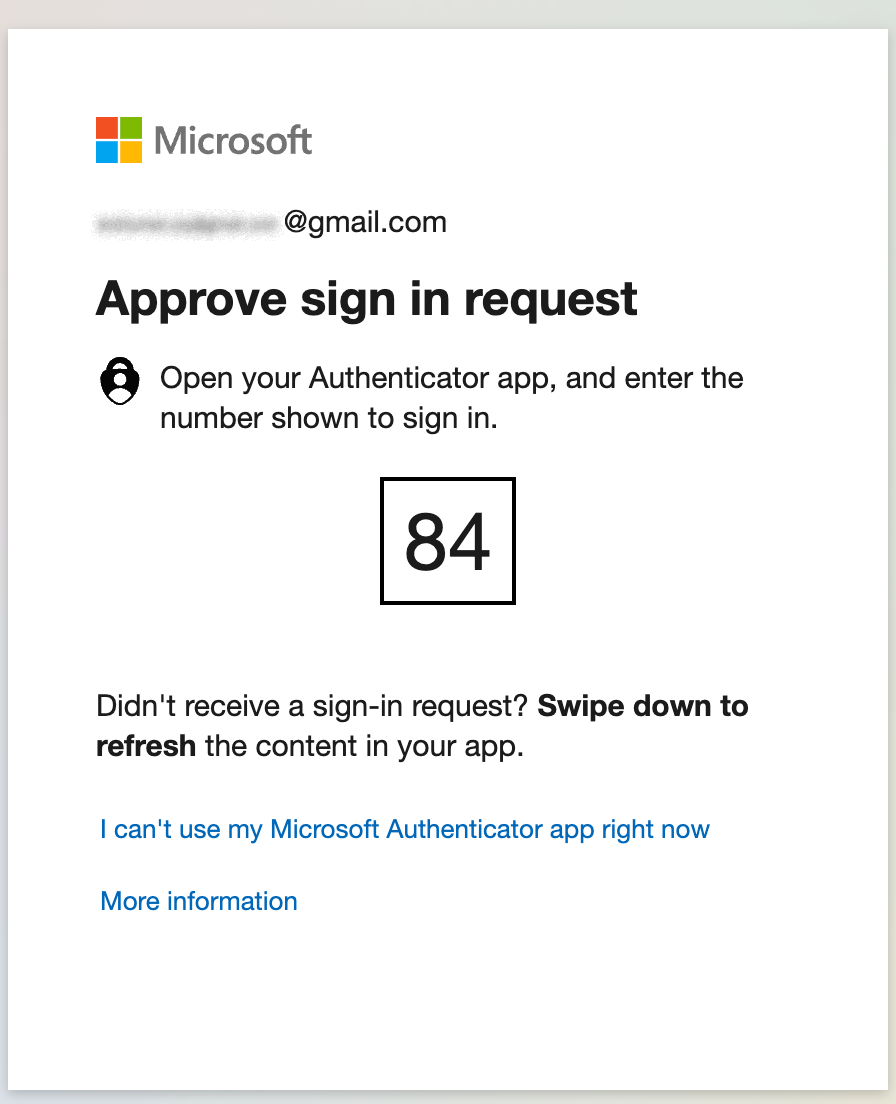
- You may be asked to authenticate again, as a test.
- You will see a passcode in your browser and will receive another notification from Microsoft Authenticator on your mobile device. Enter the displayed number in your Authenticator app and tap Yes.
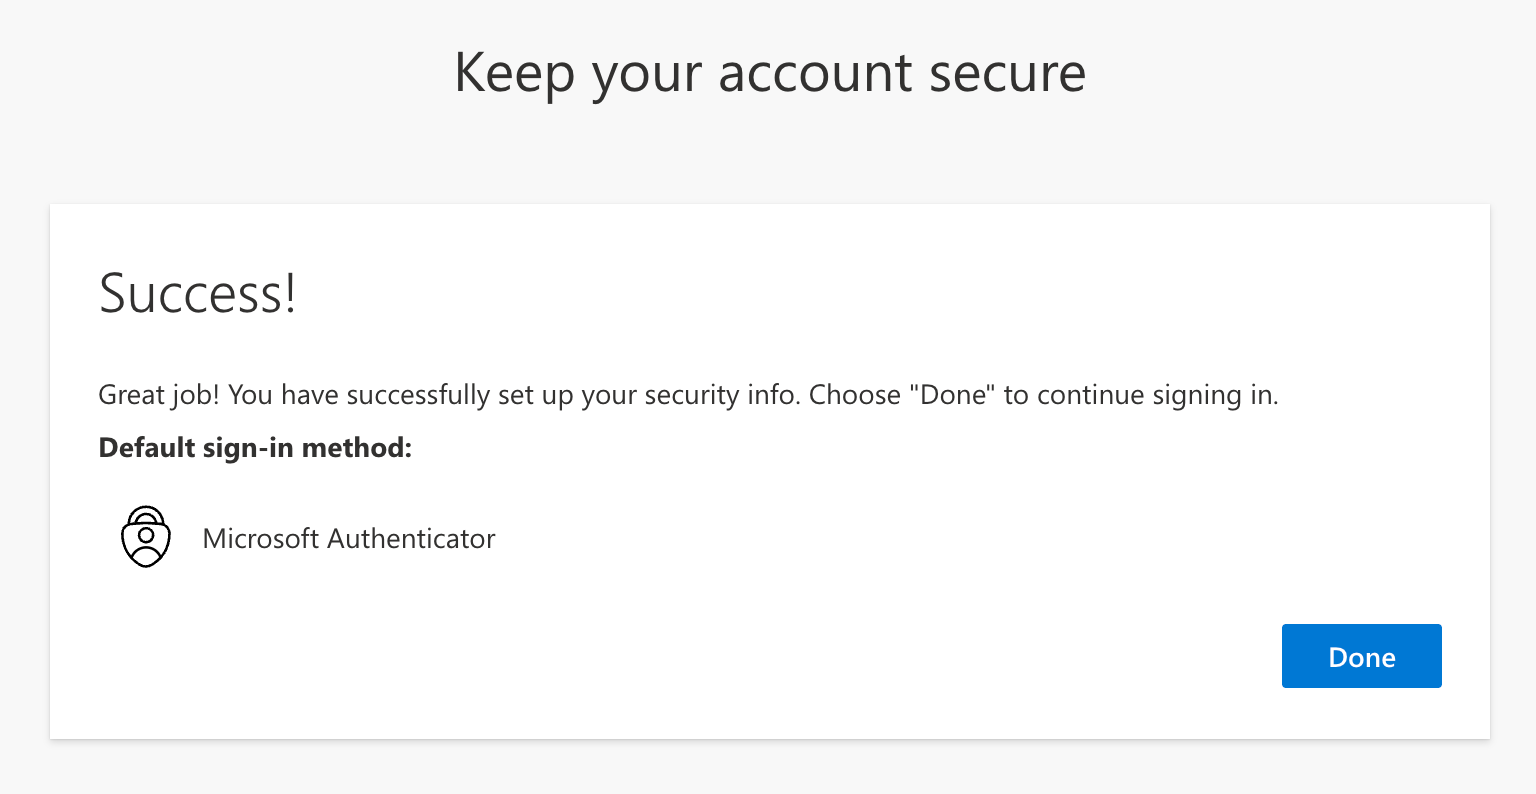
After setup, your Microsoft Authenticator app is linked to the D. E. Shaw group account for secure SharePoint Online access. For any help, please reach out to your contact at the D. E. Shaw group.
Setup Alternate Authentication Method
We recommend using Microsoft Authenticator for 2FA: it is more secure than alternate authentication methods, while still supporting push notification authentication and offline support. If you are unable to use Microsoft Authenticator, reach out to your contact at the D. E. Shaw group and wait for confirmation before proceeding to use your phone number for authentication via SMS.
Requirements
- An active Microsoft Account with your sign-in email.
- Invitation or link via email sent by your contact at the D. E. Shaw group.
Instructions
- You will receive an email invitation with a button or link to Open the shared file. Click it to start. You will be redirected to the Microsoft Login page.
- Enter your email address and click Next.
- Click Send Code to receive a one-time passcode by email. Enter the code as instructed.

- [Optional] You might be asked if you want to stay signed in.
- Click Yes to reduce future sign-ins.
- Click No if you prefer to sign in each time.

- [Optional] You might be asked to create a passkey for quicker access.
- Click Next to continue.
- Click Skip for now if you prefer to skip.
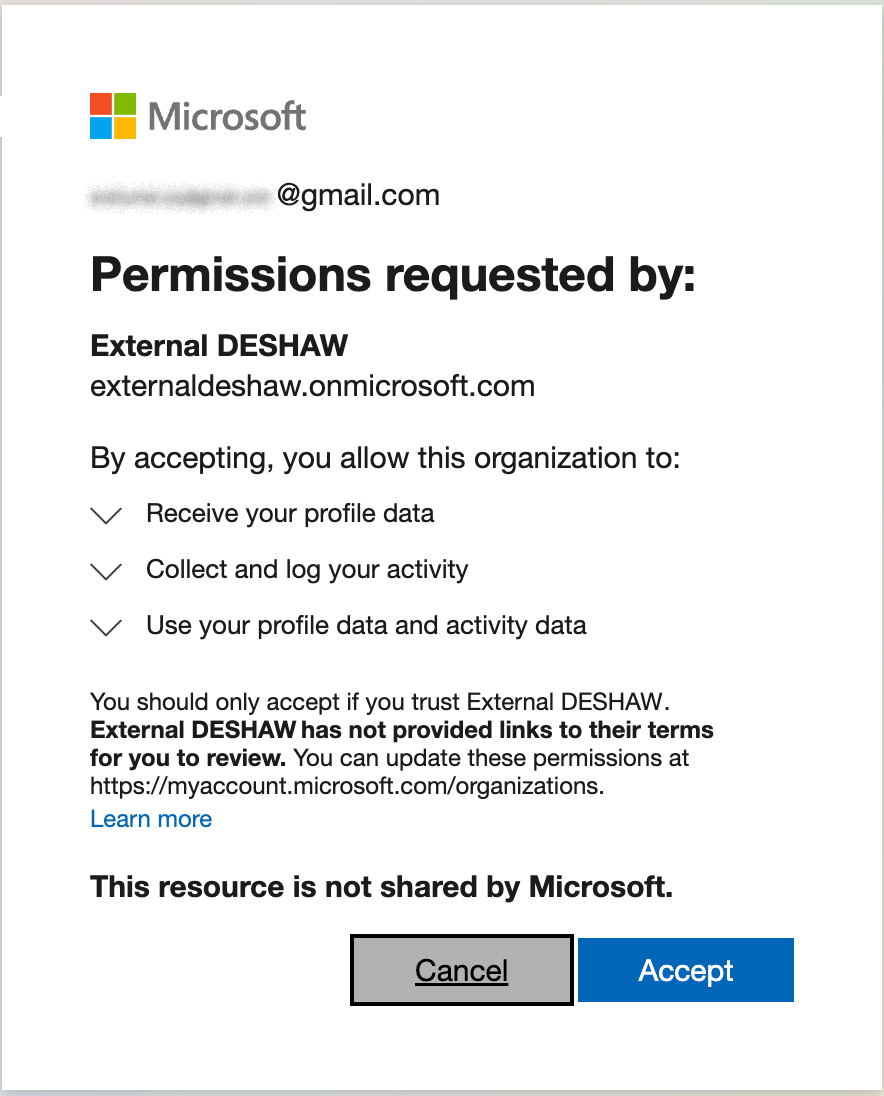
- A form may appear requesting permissions from the D. E. Shaw group. Click Accept.
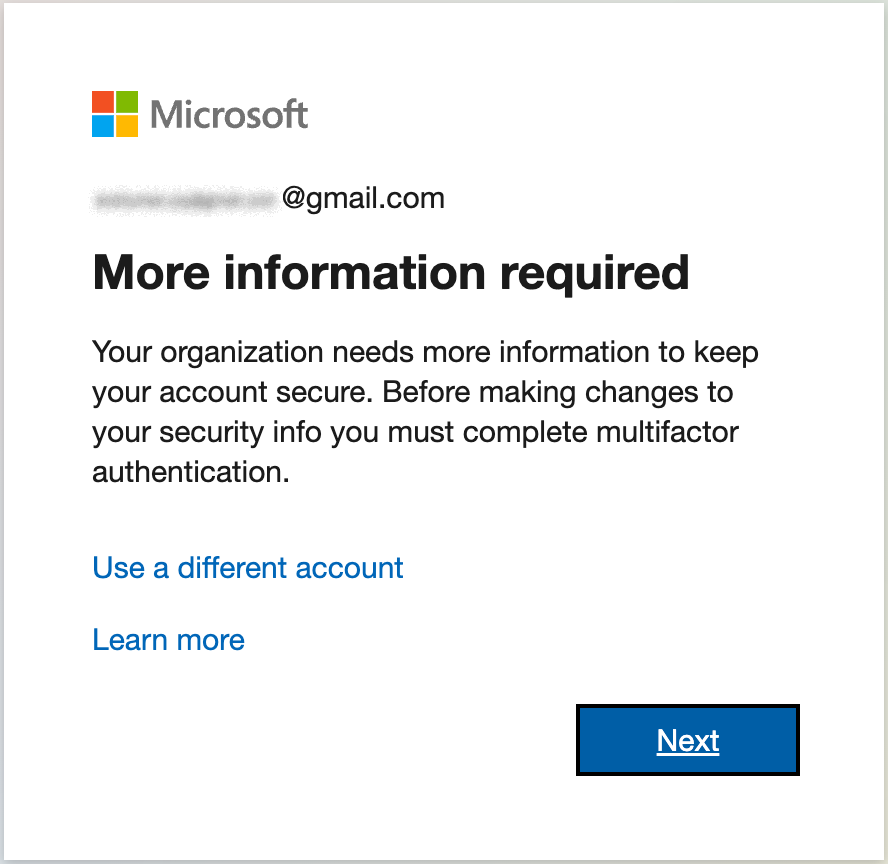
- You will see a form for "More information required." Click Next.
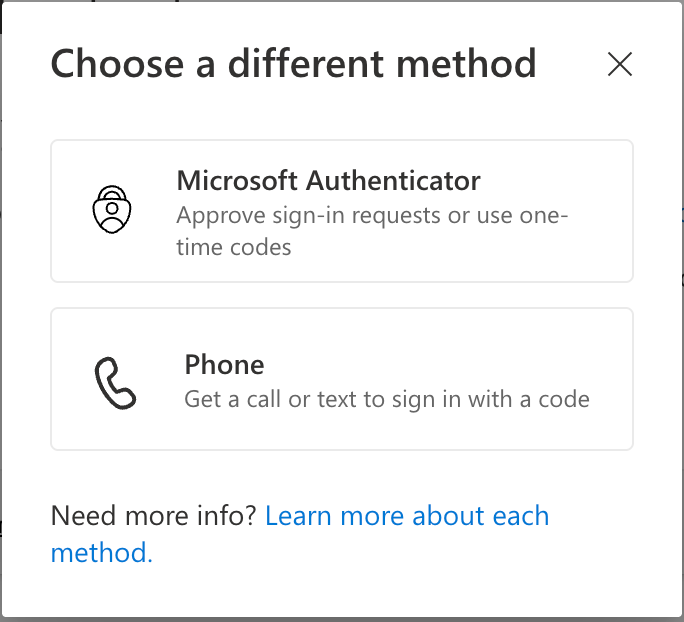
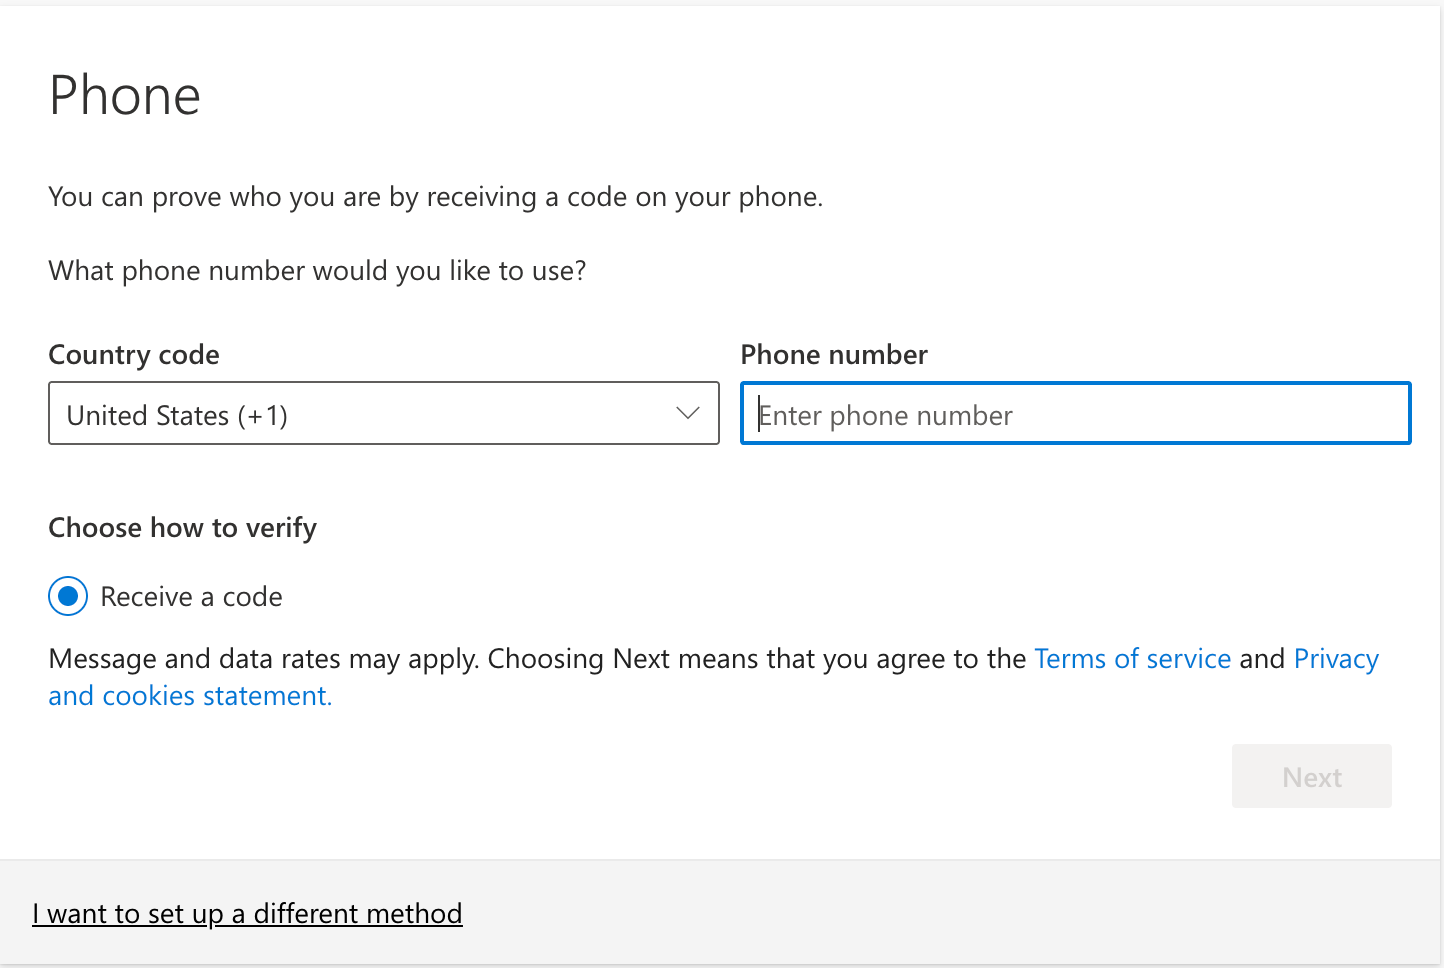
- The system will prompt you to set up an authentication method for the D. E. Shaw group. If you prefer not to use Microsoft Authenticator, select I want to set up a different method and then choose Phone in the pop-up window.
- Set up access:
- When prompted, enter your phone number.
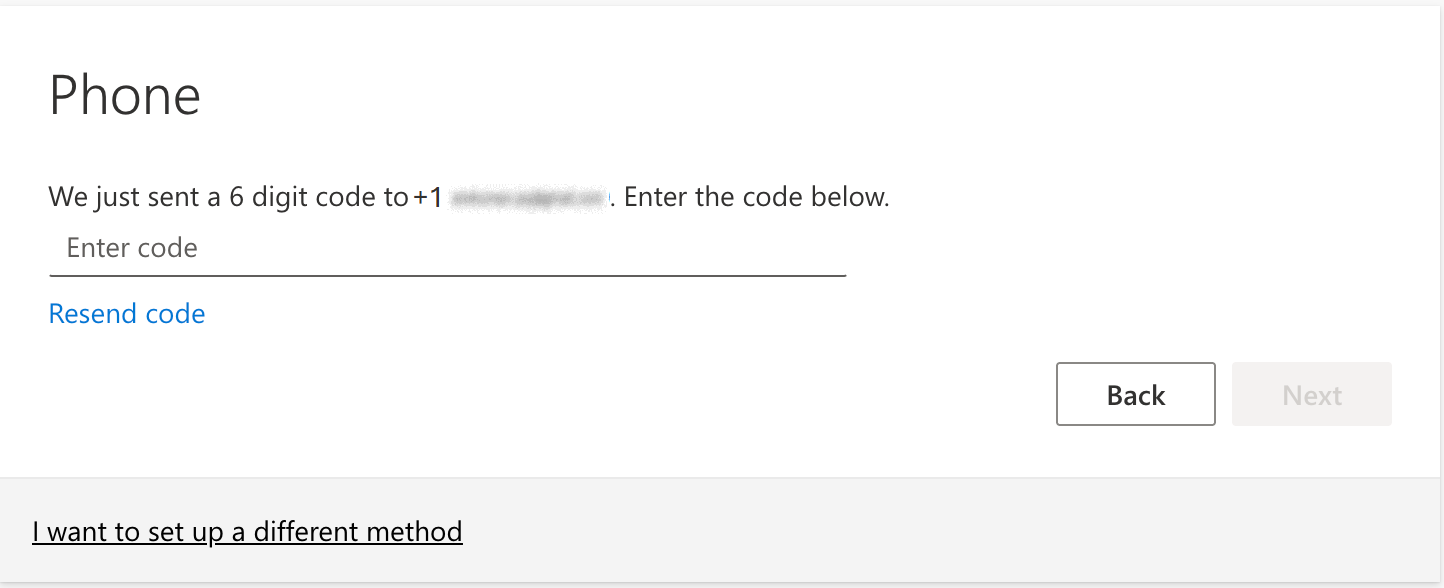
- You will receive a one-time passcode via SMS. Enter it in the space provided.
- Once you enter the correct code, a Verification Complete notification will appear.

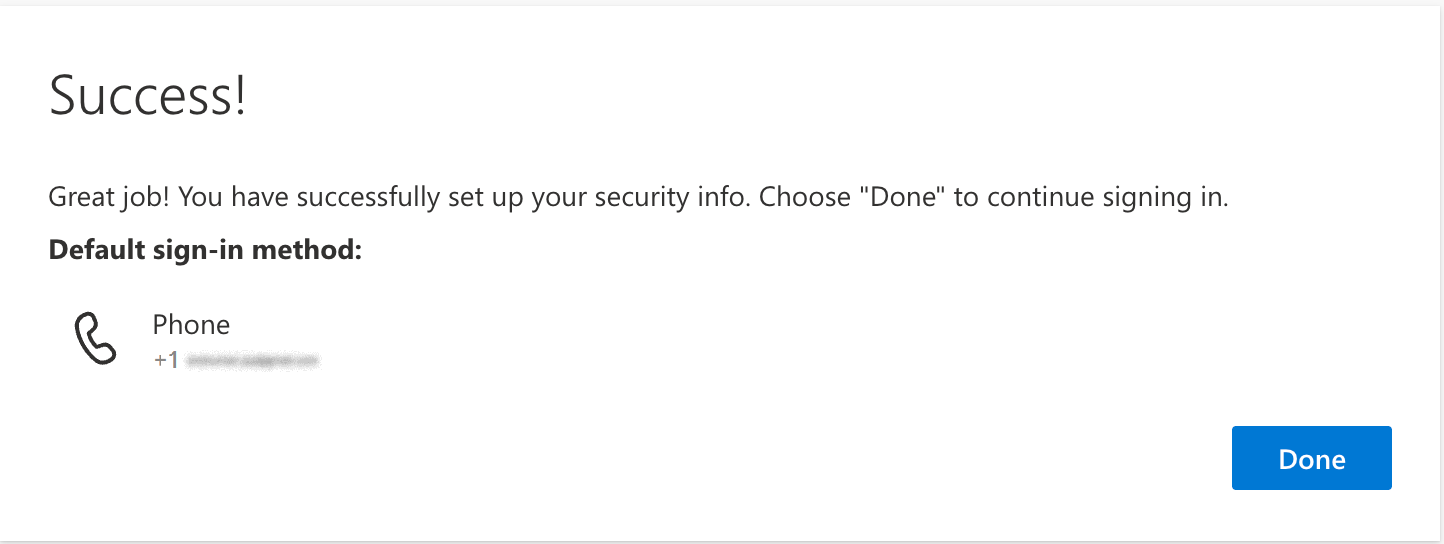
- Two-factor authentication via SMS is successfully set up. You will be redirected to the shared file.
After completion, your phone number is linked to the D. E. Shaw group account, enabling secure access to SharePoint Online files. If you encounter any issues, please reach out to your contact at the D. E. Shaw group for help.
After setting up your Microsoft account and authentication method, you will be able to access any files shared with you by your contacts at the D. E. Shaw group.
After navigating to the D. E. Shaw group's SharePoint Online site, or opening the shared file via email:
- Sign in using your Microsoft account.
- Returning users may already be signed in and automatically redirected to the authentication prompt. If you're already signed in, you'll be prompted to authenticate instead.
- When prompted, enter the one-time passcode sent to your email.
- Select your sign-in preferences:
- Yes to reduce future sign-ins.
- No if you prefer to sign in each time.
- Authenticate using the 2FA method you chose when first setting up your account:
- Authenticate with Microsoft Authenticator:
- In the SharePoint Online browser, a passcode will appear.
- On your mobile device, you will receive a prompt from Microsoft Authenticator to enter the passcode.
- Enter the passcode, then tap Yes
- Authenticate with SMS:
- Select your registered number for verification.
- You will get a one-time passcode by SMS. Enter it and click Verify.
- Authenticate with Microsoft Authenticator:
- After authentication is complete, you'll be redirected to the shared file or folder.
Viewing a file or folder
There are two ways to access a file/folder that has been shared with you:
- Click the link in the invitation and complete the authentication process as described above. You will then be redirected to the file or folder.
- Navigate through the folder hierarchy or add the folder/file path to the site URL.
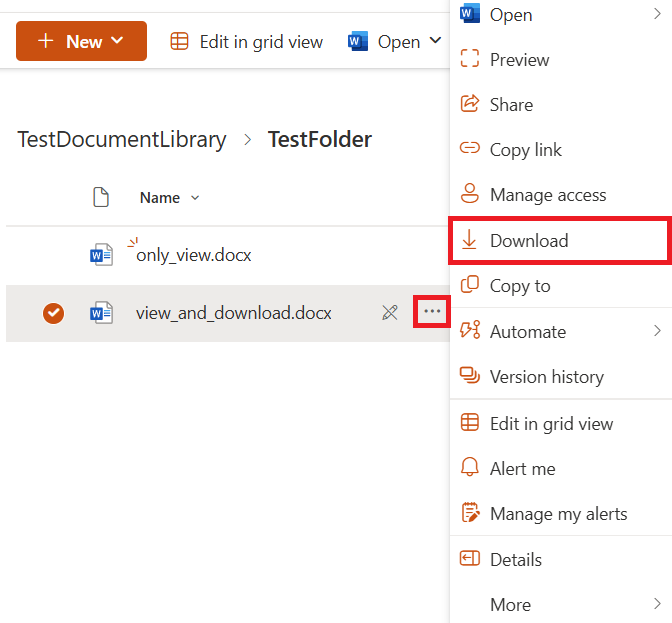
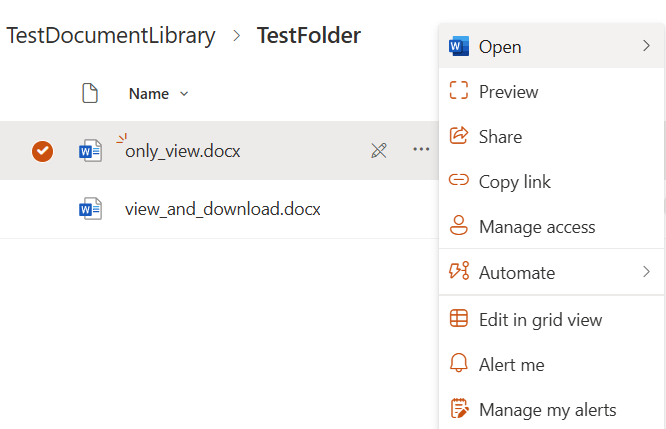
Downloading a file or folder
- Click the three dots next to the file or folder. If the Download option appears, click it to download automatically. Folders will be compressed into a zip file before downloading.
- If you do not see the Download option, you lack the necessary permissions. Please reach out to your contact at the D. E. Shaw group.
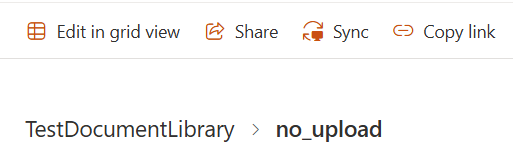
Uploading a file
- Go to the desired folder. At the top, click Upload. Select a file or folder, and it will upload automatically.
- Note: If prompted to sign in to Microsoft while uploading or viewing a file, select Not Now.

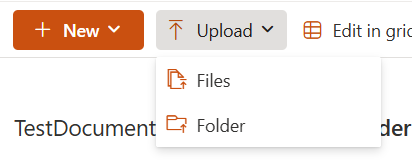
- If you don't see the Upload option, you lack the necessary permissions. Please reach out to your contact at the D. E. Shaw group.